Hendrickson Lift Axle Parts PDF: A Comprehensive Guide
Hendrickson provides extensive resources, including a Parts Look Up System (PLUS), configurators, and online videos, aiding in identifying genuine suspension components.
Accessing Parts Lists like H892 facilitates locating aftermarket parts for steerable auxiliary lift axles, ensuring optimal trailer suspension performance and maintenance.
This guide compiles information for locating Hendrickson lift axle parts, utilizing serial numbers and offering insights into genuine versus aftermarket options.
Hendrickson lift axles represent a significant advancement in commercial vehicle suspension technology, designed to enhance operational efficiency and regulatory compliance. Introduced with road-friendly suspension options around June 2021, these systems allow operators to raise and lower auxiliary axles as needed, optimizing weight distribution and reducing tire wear.
These axles are crucial for maximizing payload capacity while adhering to bridge law regulations, a key consideration for long-haul trucking and heavy-duty transport. Hendrickson’s commitment to innovation is evident in their comprehensive range of lift axle solutions, catering to diverse applications and load requirements. Understanding the intricacies of these systems is paramount for effective maintenance and parts replacement.
Hendrickson trailer commercial vehicle systems have manufactured millions of suspension components, and each axle is supplied with an identifying part number. Accessing resources like the Hendrickson PLUS system and online catalogues is vital for pinpointing the correct parts for specific models, ensuring compatibility and optimal performance. Proper identification, often utilizing the axle’s serial number (e.g., CT120515), is the first step in successful parts sourcing.
Understanding Lift Axle Systems
Hendrickson lift axle systems fundamentally operate by adding an additional axle that can be raised or lowered based on load conditions. When unladen or lightly loaded, the axle is lifted, reducing tire wear, fuel consumption, and overall operational costs. Conversely, when heavily loaded, the axle is deployed to distribute weight more evenly, improving stability and complying with legal weight limits.
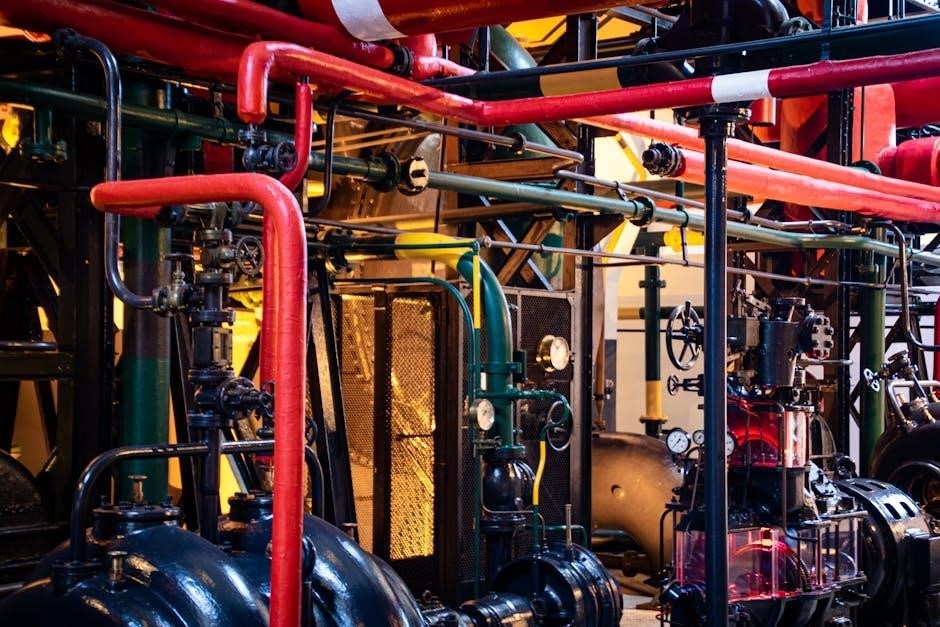
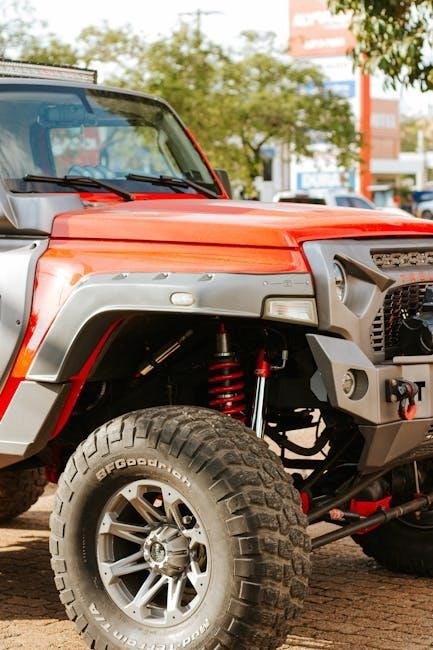
The core components include the axle assembly itself, air suspension components, and a control system – often utilizing valves and an integrated control panel. These systems rely on air pressure to raise and lower the axle, making air lines and related hardware critical parts. Proper functioning hinges on maintaining the integrity of these pneumatic elements.
Hendrickson offers both steerable and non-steerable lift axle configurations, each with unique characteristics and parts requirements. Understanding the specific type installed is crucial for accurate parts identification and maintenance. Utilizing resources like H892 parts lists and the Hendrickson website provides detailed schematics and component breakdowns.

Benefits of Using Hendrickson Lift Axles
Employing Hendrickson lift axles delivers substantial operational and economic advantages. Primarily, they optimize fuel efficiency by reducing rolling resistance when the axle is raised, leading to significant cost savings over time. Furthermore, tire wear is minimized, extending the lifespan of tires and decreasing replacement frequency – a major expense for commercial vehicles.
Beyond cost reduction, Hendrickson systems enhance vehicle stability, particularly when fully loaded, by distributing weight across more axles. This improved weight distribution also contributes to better braking performance and overall safety. Compliance with weight regulations is simplified, avoiding potential fines and ensuring legal operation.
Access to detailed parts information, via resources like the PLUS system and online catalogues, ensures efficient maintenance and minimizes downtime. Utilizing genuine Hendrickson parts maintains optimal suspension performance and maximizes the long-term benefits of the lift axle investment.
Identifying Hendrickson Lift Axle Components
Hendrickson systems comprise axle assemblies, control panel valves, and air suspension parts; accurate identification, using serial numbers and parts lists, is crucial.
Understanding component types ensures correct parts selection and efficient maintenance procedures for optimal performance.
Axle Assemblies and Types
Hendrickson offers a diverse range of lift axle assemblies, catering to various commercial vehicle applications and load requirements. These include straight beam axles and steerable lift axles, each designed for specific operational needs. Identifying the correct assembly type is paramount for ensuring compatibility and optimal performance.
The COMPOSITE EXS steerable auxiliary lift axle, for example, is supported by dedicated parts lists like H892, facilitating easy sourcing of replacement components. Direct replacement options are also available, mirroring East OEM Axle Assemblies, simplifying maintenance and reducing downtime. Understanding the nuances of each assembly – whether it’s a drop axle or a straight axle – is vital when ordering replacement parts.
Furthermore, recognizing the specific features of road-friendly suspension systems, introduced in June 2021, is essential. Referencing documentation on shock absorbers and hardware will aid in correctly identifying these advanced suspension configurations. Proper identification ensures the correct parts are used, maintaining the integrity and efficiency of the Hendrickson axle assembly.
Control Panel Valves for Lift Axles
Hendrickson lift axle control panel valves are critical components regulating air suspension and axle operation. These valves manage the raising and lowering of the lift axle, optimizing vehicle handling and weight distribution. Sourcing the correct valve is essential for maintaining system functionality and safety.
Trailer axle assembly options frequently include lift axle control panel valves, readily available from various suppliers. When identifying replacement valves, referencing the Hendrickson PLUS (Parts Look Up System) is highly recommended. This system ensures accurate parts identification based on axle serial numbers and specific model configurations.
Genuine Hendrickson parts are preferred for optimal performance and reliability, though aftermarket options exist. Proper valve operation directly impacts suspension performance and load capacity. Maintaining these valves through regular inspection and timely replacement contributes to extended axle life and reduced maintenance costs. Accurate identification, facilitated by online resources and parts catalogues, is key.
Air Suspension Components
Hendrickson truck air suspension systems rely on a network of interconnected components for optimal performance. These include air springs, height control valves, air lines, and related hardware, all working in unison to provide a smooth and controlled ride. Maintaining these components is crucial for ensuring vehicle stability and preventing premature wear.
Genuine Hendrickson parts are designed to integrate seamlessly with existing systems, guaranteeing compatibility and reliability. Road-friendly suspensions, introduced in June 2021, require specific components; referencing shock absorber and hardware guides aids in correct identification. The Hendrickson website offers detailed resources for locating these parts.
Regular inspection of air springs for leaks or damage, along with checking air line connections, is vital. Utilizing the Hendrickson PLUS system and parts catalogues (like H892) simplifies the identification process. Proper maintenance of air suspension components extends the lifespan of the entire system and enhances overall vehicle safety.
Locating Hendrickson Lift Axle Parts Information
Hendrickson offers multiple avenues for parts identification, including the PLUS system, website configurators, and comprehensive parts lists like H892 for easy access.
Online educational videos and detailed catalogues further streamline the process of finding the correct lift axle components.
Hendrickson PLUS (Parts Look Up System)
Hendrickson’s PLUS (Parts Look Up System) is a crucial digital tool designed to simplify the identification and procurement of genuine Hendrickson lift axle parts.
This online system allows users to quickly locate the correct parts based on specific axle serial numbers, ensuring compatibility and minimizing errors in ordering.
By inputting the axle’s serial number – typically formatted like CT120515 – the PLUS system delivers a detailed breakdown of all applicable components.
This includes everything from pins and bushes to shock absorbers and control panel valves, providing a comprehensive view of the axle’s construction.
The system’s intuitive interface and extensive database make it an invaluable resource for maintenance professionals, fleet managers, and parts distributors.
PLUS streamlines the parts ordering process, reducing downtime and ensuring that only genuine Hendrickson components are used in repairs and maintenance.
Access to the PLUS system is readily available through the Hendrickson website, offering a convenient and efficient solution for all lift axle parts needs.
It’s a cornerstone of Hendrickson’s commitment to supporting its customers with reliable parts information and availability.
Hendrickson Website Resources & Configurators
The Hendrickson website serves as a central hub for accessing a wealth of information regarding lift axle parts and overall suspension systems.
Beyond the PLUS Parts Look Up System, Hendrickson offers interactive configurators specifically designed for lift axles and bumpers.

These configurators allow users to visualize different component combinations and ensure proper specification for their application.
The website also hosts a library of online educational videos, providing valuable insights into Hendrickson products and maintenance procedures.
Detailed product documentation, including parts catalogues and technical specifications, is readily downloadable in PDF format.
Users can find information on axle assemblies, air suspension components, and specific lift axle control panel valves.
Hendrickson’s commitment to digital resources ensures that customers have easy access to the information needed for effective suspension management.
The website is regularly updated with the latest parts information and technical support materials, solidifying its role as a primary resource.

Accessing Parts Lists & Catalogues (H892, etc.)
Hendrickson provides comprehensive parts lists and catalogues, crucial for identifying and sourcing components for lift axle systems.
The Parts List H892 is specifically designed to assist in locating commonly required aftermarket parts and kits for COMPOSILITE EXS Steerable Auxiliary Lift Axles.
These catalogues detail exploded views of axle assemblies, facilitating accurate parts identification and ordering.
Access to these resources streamlines the maintenance and repair process, minimizing downtime and ensuring optimal suspension performance.
Beyond H892, Hendrickson offers a range of other catalogues covering various lift axle models and component types.
These documents often include detailed specifications, material information, and compatibility notes.
Locating the correct catalogue is essential for ensuring that the parts purchased are compatible with the specific axle in question.
Hendrickson’s commitment to detailed documentation supports efficient suspension maintenance and repair operations.
Specific Hendrickson Lift Axle Parts

Hendrickson offers a wide array of parts, including pins and bushes, shock absorbers, and specialized components for steerable lift axles.
Genuine Hendrickson parts ensure optimal performance and longevity for your trailer suspension systems.
Pins and Bushes
Hendrickson utilizes various pins and bushes within its lift axle systems, crucial for maintaining proper alignment and smooth operation of the suspension. These components are subject to significant stress and wear, particularly in demanding applications and challenging road conditions.
Identifying the correct pin or bush requires referencing the specific axle model and serial number. Hendrickson’s Parts Look Up System (PLUS) is invaluable for this process, providing detailed diagrams and part numbers. Common failure points include wear and tear leading to increased play, impacting steering and stability.
When replacing pins and bushes, it’s highly recommended to use genuine Hendrickson parts to ensure compatibility and maintain the original performance characteristics of the suspension. Aftermarket options may exist, but quality and durability can vary significantly. Proper installation, utilizing the correct tools and torque specifications, is essential for longevity and safety. Regular inspection of these components during routine maintenance is vital for preventing unexpected failures and costly repairs.
Shock Absorbers & Hardware
Hendrickson truck air suspensions often incorporate shock absorbers and associated hardware to dampen vibrations and enhance ride quality. These components are critical for controlling axle movement and minimizing stress on the suspension system, particularly with lift axles.
Road friendly suspensions, introduced in June 2021, require specific attention to shock absorber identification; Referencing detailed parts lists and diagrams is essential when sourcing replacements. The hardware securing these shock absorbers – including bolts, nuts, and mounting brackets – must also be inspected for wear or damage.
Hendrickson provides identifying part numbers for its air suspensions, aiding in accurate shock absorber selection. Using genuine Hendrickson parts ensures compatibility and optimal performance. When replacing shock absorbers, always verify the correct application based on the axle model and serial number. Proper torque specifications during installation are crucial for maintaining suspension integrity and preventing premature failure.
Steerable Lift Axle Components
Hendrickson’s steerable lift axle systems utilize specialized components beyond standard lift axle parts. These include steering linkages, steering gears, and associated mounting brackets, all designed to enable controlled turning of the lift axle. Identifying these unique components is crucial for accurate repairs and maintenance.
Parts List H892 specifically addresses aftermarket parts and kits for COMPOSILITE EXS Steerable Auxiliary Lift Axle systems, highlighting the availability of replacements for these complex assemblies. Proper alignment of the steering components is vital for optimal handling and tire wear.
When sourcing parts, referencing the axle serial number is paramount, as different steerable lift axle models may have variations in component design. Hendrickson’s PLUS system and website resources can assist in identifying the correct parts based on the specific axle configuration. Maintaining these components ensures safe and efficient operation of the steerable lift axle.

Troubleshooting & Maintenance
Hendrickson emphasizes using axle serial numbers for precise parts identification, ensuring compatibility and correct repairs. Genuine parts maximize suspension performance.
Regular maintenance, guided by Hendrickson’s resources, is key to extending component life and maintaining optimal trailer operation.
Using Axle Serial Numbers for Parts Identification
Hendrickson strongly advocates utilizing the axle serial number as the primary method for accurate parts identification when servicing or repairing lift axle systems. This alphanumeric code, typically found directly on the axle itself – often resembling “CT120515” – acts as a unique identifier for that specific assembly.
Providing this serial number to Hendrickson or authorized distributors unlocks access to precise parts lists and diagrams tailored to your exact axle configuration. This eliminates guesswork and minimizes the risk of ordering incorrect or incompatible components, which can lead to further issues and downtime.
The serial number reveals critical information about the axle’s manufacturing date, specifications, and original component selection. Utilizing the Hendrickson PLUS system or contacting their support team with the serial number ensures you receive the correct suspension parts, guaranteeing proper fit and function. Accurate identification is paramount for maintaining peak suspension performance and safety.
Genuine Hendrickson Parts vs. Aftermarket Options
While aftermarket parts for Hendrickson lift axles are available, Hendrickson emphasizes the benefits of utilizing genuine parts to maintain optimal suspension performance and longevity. Genuine Hendrickson parts are engineered and rigorously tested to meet the exact specifications of their systems, ensuring seamless integration and reliable operation.
Aftermarket alternatives may offer cost savings initially, but often compromise on material quality, precision manufacturing, and compatibility. This can lead to premature wear, reduced load-carrying capacity, and potential safety hazards. Using non-genuine components may also void warranty coverage.
Hendrickson has manufactured millions of suspension components over the decades, building a reputation for durability and reliability. Investing in genuine Hendrickson parts safeguards your investment, minimizes downtime, and ensures continued peak performance of your lift axle system, ultimately contributing to lower total cost of ownership.
Hendrickson Suspension Performance Maintenance
Maintaining peak Hendrickson suspension performance requires regular inspection and adherence to recommended maintenance schedules. This includes checking shock absorbers and hardware, as road-friendly suspensions require specific attention – referencing resources like page 8 for identification assistance is crucial.
Regularly inspect pins and bushes for wear and tear, replacing them as needed to prevent excessive movement and ensure proper alignment. Proper lubrication of all moving parts is also essential; Utilizing the Hendrickson PLUS system and serial numbers (like CT120515) aids in identifying the correct replacement parts.
Consistent maintenance, using genuine Hendrickson parts, extends the lifespan of your lift axle system, optimizes fuel efficiency, and enhances overall vehicle safety. Proactive care prevents costly repairs and ensures reliable operation for years to come, maximizing your return on investment.