Unboxing and Component Overview – Identify burners, side burner, grease tray, control panel, and safety latch.
Unbox the Char‑Broil grill and locate the four main burners, the auxiliary side burner, the removable grease tray, the control panel, and the safety latch that secures the lid. Inspect each component for damage before first use!!
Verify latch lock and clean grease tray before use today.!!!
Initial Safety Inspection and Required Tools – Verify intact regulator hose, secure mounting brackets, and gather adjustable wrench, propane tank, and cleaning brush.
Before powering up, perform a thorough safety check. Confirm the regulator hose is free of kinks, cracks, or leaks; inspect the hose fittings for tightness and proper seal. Verify that the grill’s mounting brackets are firmly attached to the frame and that the grill sits level on its base. Ensure the safety latch engages fully and that the lid can close without obstruction. Gather the essential tools: an adjustable wrench for tightening regulator connections, a 20‑pint propane tank with a fresh valve seal, and a stiff‑bristle cleaning brush for future maintenance; Keep the wrench and brush within reach for quick adjustments or post‑cooking cleanup. Store the propane tank in a vertical position away from heat sources, and keep the wrench and brush in a dedicated tool pouch for easy transport. This preliminary inspection safeguards against gas leaks, ensures structural integrity, and prepares you for a safe cooking experience. Additionally, check the regulator’s pressure gauge for proper reading, and confirm that the regulator’s mounting clamp is secure. Inspect the grill’s ventilation openings for obstructions, and verify that the firebox is free of debris. If any component shows wear or damage, replace it before use. Finally, test the safety latch by opening and closing the lid several times to ensure smooth operation. Enjoy!!!
Proper Ventilation and Outdoor Placement Guidelines – Place grill on level surface, maintain 10‑ft clearance from walls, and ensure adequate airflow for gas combustion.
Place the Char‑Broil grill on a stable, level surface to prevent tipping. Ensure the grill sits at least 10 feet from any walls, fences, or overhangs to allow safe exhaust flow. The manufacturer recommends a clear zone of 10 feet to avoid heat buildup and potential fire hazards. Position the grill so that the airflow is unobstructed; avoid placing it in a wind‑tunnel or near a draft that could redirect flame. Keep the grill’s exhaust vent clear of debris and leaves, and ensure the regulator hose is not kinked or pinched. The grill’s side burner should also have adequate clearance, as its flame can reach higher temperatures. Check that the grill’s mounting brackets are secure and that the lid can close fully without obstruction. When the grill is in use, maintain a safe distance between the grill and any combustible materials. For optimal combustion, the grill should have at least 3 inches of clearance between the bottom of the grill and the ground, especially if the grill is on uneven terrain. If you live in a windy area, consider using a windbreak to protect the grill from gusts that could cause uneven flame or flare‑ups. Finally, always keep a fire extinguisher or a bucket of sand nearby in case of accidental flare‑ups. Following these guidelines ensures proper ventilation, safe operation, and a pleasant cooking experience. Remember to keep the grill’s lid closed during transport and never leave the grill unattended while it is on. Safety first! Stay safe
Connecting the Propane Regulator and Checking for Leaks – Attach regulator, tighten connections, perform soap‑water leak test on each valve.
Before lighting the Char‑Broil grill, attach the propane regulator to the tank’s valve. Slide the regulator’s threaded end onto the valve, ensuring a snug fit, then tighten with an adjustable wrench—do not overtighten. Connect the regulator hose to the grill’s inlet and secure it with a hose clamp, turning the clamp clockwise until the hose is firmly seated. Once all connections are in place, perform a soap‑water leak test. Mix dish soap with water in a spray bottle or shallow dish, spray or apply the solution to each valve and hose joint, and watch for bubbles. Any bubbling indicates a leak; tighten the connection or replace the gasket. Repeat the test for the side burner and main burner valves. After confirming all joints are leak‑free, close the regulator valve slowly and check again for residual bubbles. If the regulator’s pressure gauge drifts from zero, shut off the tank, replace the regulator, and re‑check. Inspect the regulator hose for kinks or damage; a damaged hose can rupture under pressure, so replace it immediately if any cracks or bulges appear. Store the regulator and hose in a dry place when not in use, and keep the grill in a well‑ventilated area during this process. By following these steps, you guarantee a safe, leak‑free connection between the propane tank and the Char‑Broil grill, allowing you to focus on cooking rather than safety concerns!!.
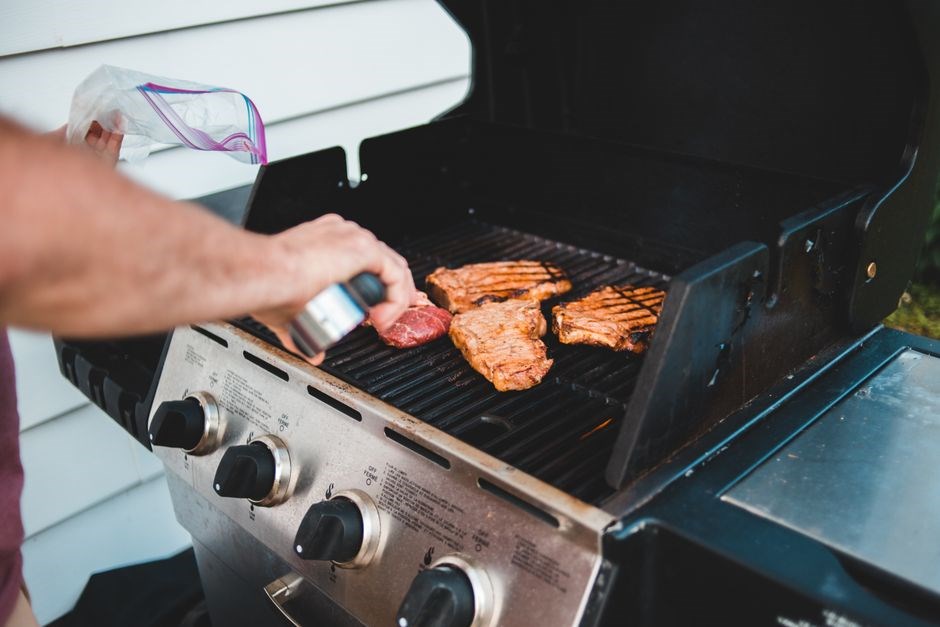
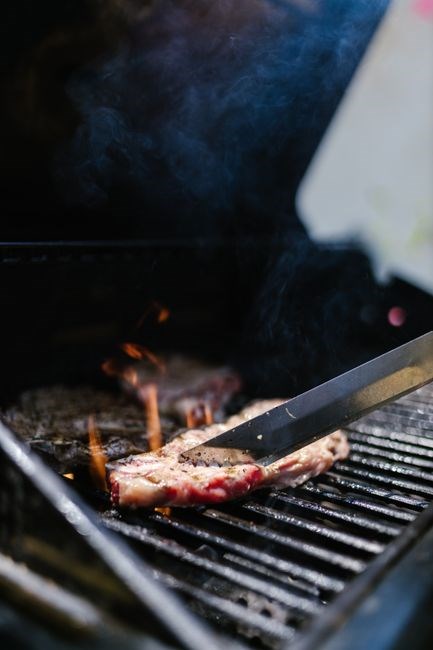
Begin by opening the main propane valve on the grill’s control panel. Turn the valve clockwise until the indicator shows “open.” Next, ignite the burners using the built‑in electric lighter or a long‑handled match. If using a match, light it first, then hold it near the burner’s flame inlet while turning the ignition switch to “ignite.” Allow the flame to stabilize for 30‑60 seconds; the burners should emit a steady, even orange flame. If the flame flickers or is uneven, close the valve, wait a minute, then relight. Once all burners are glowing uniformly, adjust the heat dials to the desired level before placing any food. Keep the grill lid slightly ajar during the initial burn‑in to ensure proper ventilation and prevent excess heat buildup. After the burners have reached a steady state, you can safely close the lid and begin cooking. Always keep a fire extinguisher nearby and never leave the grill unattended while it is lit. This procedure ensures a safe and reliable ignition for your Char‑Broil grill, setting the stage for a perfect cook. If you notice a weak flame, check that the regulator is fully open and that the hose is not kinked. Inspect the burner ports for any debris that could be blocking airflow; a small piece of foil or food residue can cause uneven burning. Use a small brush to clean the ports if needed before relighting. Perform a quick soap‑water test on the burner connections after the initial ignition to confirm no leaks. If bubbles appear, shut off the main valve immediately, tighten the connections, and retest
Ignition Procedure and First Light Setup – Open main valve, ignite with built‑in lighter or match, and allow burners to reach steady flame before cooking.
Begin by opening the main propane valve on the grill’s control panel. Turn the valve clockwise until the indicator shows “open.” Next, ignite the burners using the built‑in electric lighter or a long‑handled match. If using a match, light it first, then hold it near the burner’s flame inlet while turning the ignition switch to “ignite.” Allow the flame to stabilize for 30‑60 seconds; the burners should emit a steady, even orange flame. If the flame flickers or is uneven, close the valve, wait a minute, then relight. Once all burners are glowing uniformly, adjust the heat dials to the desired level before placing any food. Keep the grill lid slightly ajar during the initial burn‑in to ensure proper ventilation and prevent excess heat buildup. After the burners have reached a steady state, you can safely close the lid and begin cooking. Always keep a fire extinguisher nearby and never leave the grill unattended while it is lit. This procedure ensures a safe and reliable ignition for your Char‑Broil grill, setting the stage for a perfect cook.
Tip: Rotate food every 3–4 minutes on the high‑heat side, then move to the low‑heat side for gentle cooking. This keeps juices locked in while preventing flare‑ups. for results.??!!
Pre‑Heat Duration and Temperature Verification Methods – Heat grill 10‑15 minutes, use infrared thermometer or grill‑temperature gauge to confirm target temp.
An infrared thermometer provides instant surface temperature readings. Place the probe on the grill grate, let it sit for 5 seconds, then read the display. Record the value; this baseline helps you compare batches. If the probe shows a lower temperature than expected, increase the burner dial slightly until the reading matches the target.
Alternatively, a built‑in grill‑temperature gauge offers a quick visual read. Place the gauge on the cooking surface, then adjust the burner knobs until the gauge reaches the desired range. This method is handy when you need a quick check without a separate thermometer.
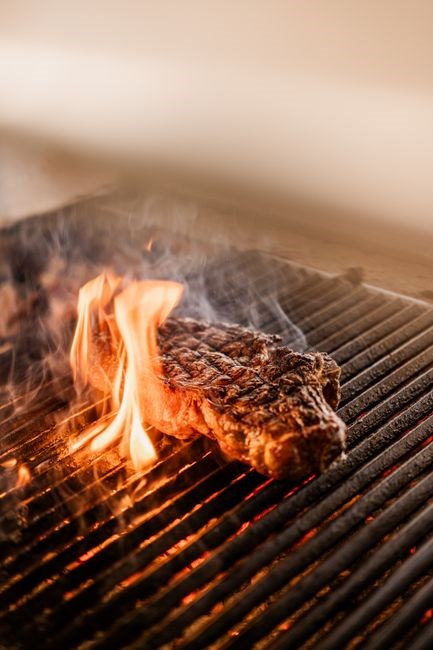
When adjusting burners, note that the flame’s color indicates heat: a steady orange flame is ideal. A blue tip means the burner is too hot and may cause flare‑ups. Use a flame gauge to fine‑tune burner output for consistent results.
Keep a log of temperature readings for each session. Over time, this data reveals patterns, letting you fine‑tune burner settings for optimal performance. Consistent practice leads to mastery of heat control!!!
When adjusting burners, note that the flame’s color indicates heat: a steady orange flame is ideal. A blue tip means the burner is too hot and may cause flare‑ups. Use a flame gauge to output for results. OK
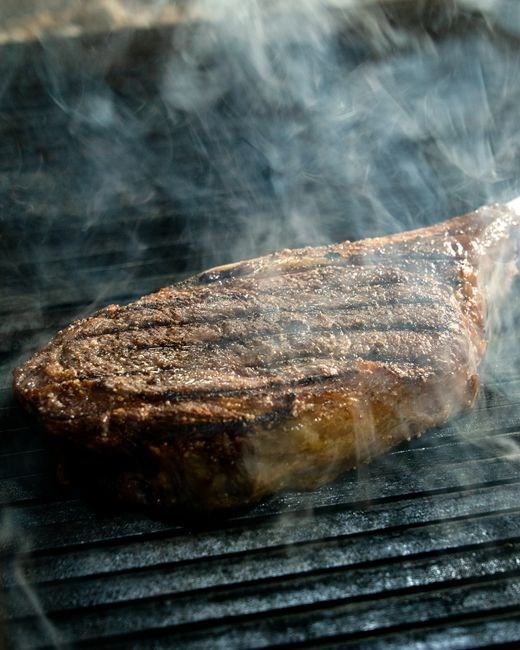
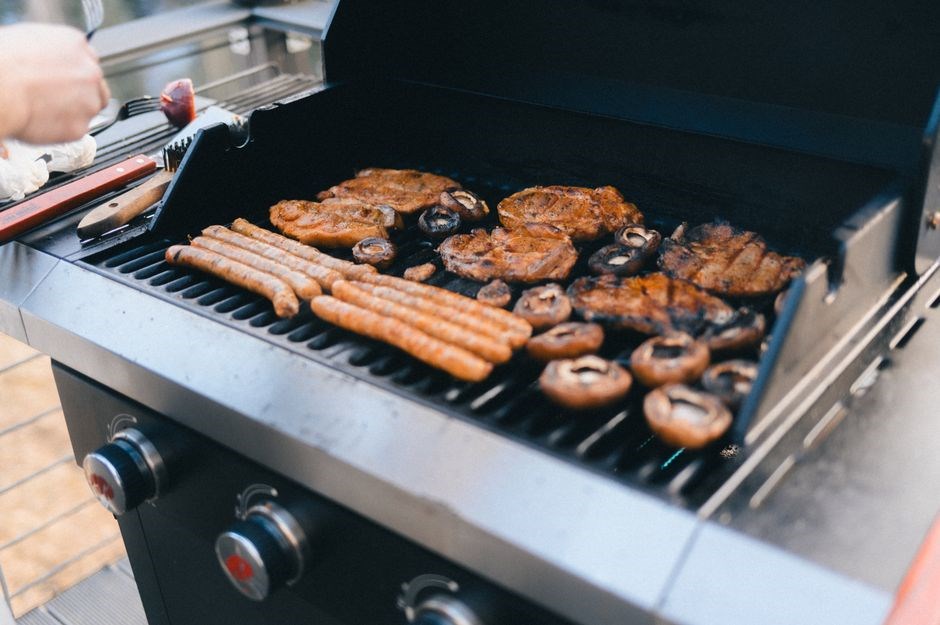
Cooking with the Double‑Header Design: Direct vs. Indirect Zones – Position food on high‑heat side for searing, then transfer to lower‑heat side for finishing.
The Char‑Broil’s dual‑firebox layout lets you master both searing and slow cooking in one session. Start by turning the main burner knobs to high on the side designated for direct heat. This zone should reach 450–500°F (232–260°C) quickly, creating a crisp crust on steaks, burgers, or chicken thighs.
Once the surface is blister‑ready, move the food to the indirect zone. Lower the burner knobs on the opposite side to medium or low, aiming for 300–350°F (149–177°C). This gentle heat cooks the interior evenly without burning the exterior.
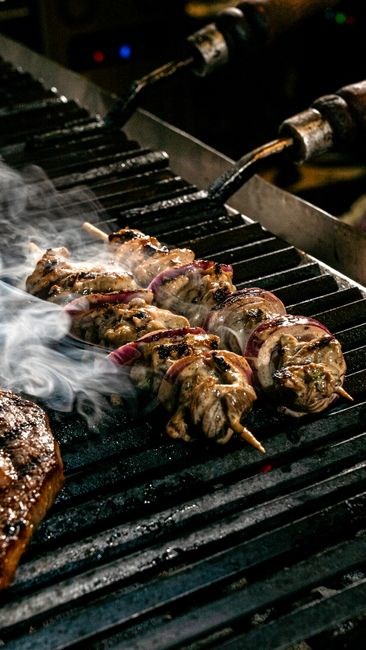
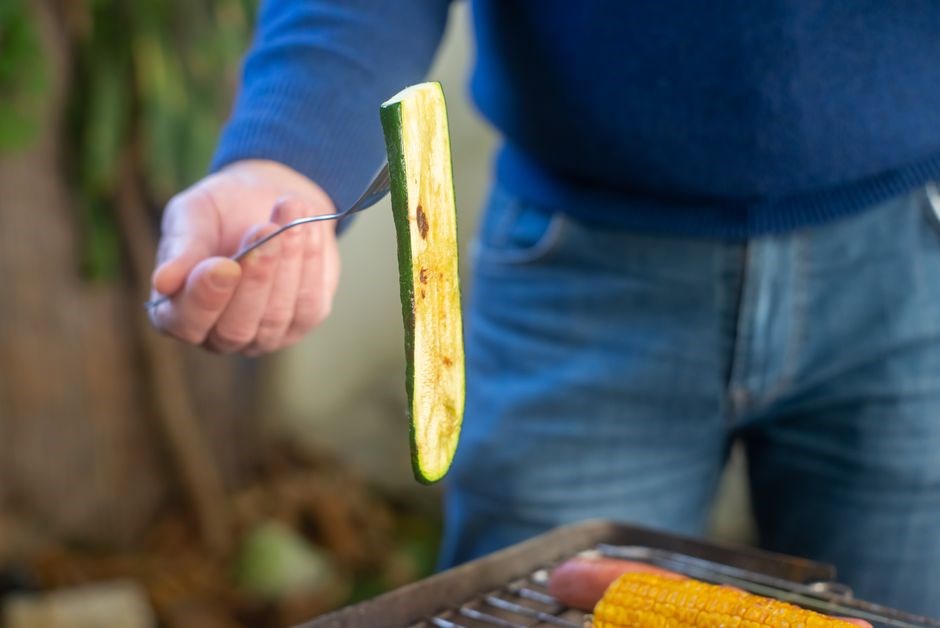
Use a two‑zone approach for larger cuts: sear the outside on direct heat, then slide the piece to indirect heat to finish. For vegetables, sear 2–3 minutes per side, then transfer to indirect heat to steam and soften.
Keep the lid closed during the indirect phase to trap steam and maintain consistent temperature. Check the internal temperature with a probe thermometer; aim for 145°F (63°C) for pork, 165°F (74°C) for poultry, and 135–140°F (57–60°C) for medium‑rare beef.
When the cooking cycle ends, allow the grill to cool before cleaning. The double‑header design saves time and gives you professional results with minimal effort.
Use a timer to monitor cooking time, noting finishes in 5–7 minutes while indirect may take 20–30 minutes for large cuts. Adjust now!!!
The Char‑Broil’s dual‑firebox layout lets you master both searing and slow cooking in one session. Start by turning the main burner knobs to high on the side designated for direct heat. This zone should reach 450–500°F (232–260°C) quickly, creating a crisp crust on steaks, burgers, or chicken thighs.
Once the surface is blister‑ready, move the food to the indirect zone. Lower the burner knobs on the opposite side to medium or low, aiming for 300–350°F (149–177°C). This gentle heat cooks the interior evenly without burning the exterior.
Use a two‑zone approach for larger cuts: sear the outside on direct heat, then slide the piece to indirect heat to finish. For vegetables, sear 2–3 minutes per side, then transfer to indirect heat to steam and soften.
Keep the lid closed during the indirect phase to trap steam and maintain consistent temperature. Check the internal temperature with a probe thermometer; aim for 145°F (63°C) for pork, 165°F (74°C) for poultry, and 135–140°F (57–60°C) for medium‑rare beef.
When the cooking cycle ends, allow the grill to cool before cleaning. The double‑header design saves time and gives you professional results with minimal effort.
Use a silicone mat on the side burner to catch drips, then wipe with a damp cloth. For sauces, a quick stir with a wooden spoon keeps the mixture from sticking. If you need a smoky flavor, add a pinch of liquid smoke to the pan. Always keep the burner away from flammable items. Enjoy grilling!!!
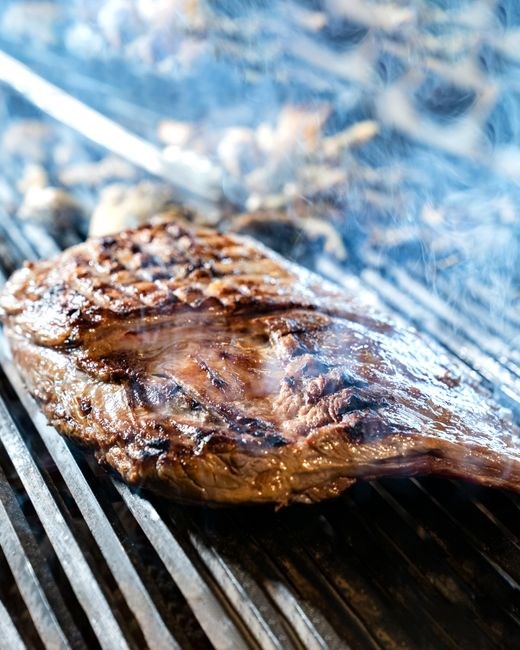
Temperature‑Sensitive Food Techniques (e.g., searing, slow‑cooking) – Use high heat for searing steaks, then lower heat for slow‑cooking ribs.
When grilling temperature‑sensitive foods on a Char‑Broil, start by setting the main burners to high (450‑500°F) to achieve a perfect sear. Place the steak or rib rack on the direct‑heat side, allowing the surface to develop a caramelized crust within 2‑3 minutes per side. Use a meat thermometer to confirm the internal temperature: 130‑135°F for medium‑rare steak, 145°F for medium. Once the sear is complete, immediately shift the rack to the indirect side and lower the burners to medium‑low (300‑350°F). This gentle heat allows the meat to cook through without burning the exterior, preserving juices and tenderness. For ribs, after searing the bones, wrap the rack in foil with a splash of apple cider vinegar and a drizzle of your favorite BBQ sauce, then slow‑cook for 2‑3 hours until the meat is fork‑tender. Monitor the temperature with a probe, aiming for 190‑205°F for pork ribs. Keep the lid closed to trap steam, and periodically baste with sauce to build flavor. This two‑stage method ensures a crusty exterior and a succulent interior, ideal for both quick steaks and long‑roasted ribs.
When working with temperature‑sensitive cuts, always pre‑heat the grill to the desired zone before placing the food. For thick steaks, use a two‑step sear: first a quick 30‑second flare on high, then a 1‑minute rest on medium to allow the interior to rise to target. For delicate fish, keep the flame low and use a lid to trap heat, ensuring a gentle, even cook that preserves moisture and flavor..
Cleaning the Grates and Removing Food Residue Post‑Use – Scrape grates with stiff brush, rinse with warm soapy water, dry thoroughly.
After each grilling session, remove the grates and allow them to cool. Use a stiff‑bristle brush to scrape off any stuck‑on residue, paying special attention to the grill’s nooks and crannies. Then, rinse the grates under hot, soapy water, scrubbing gently to remove any lingering grease. For stubborn stains, soak the grates in a mixture of hot water and a few drops of dish‑washing liquid for 10–15 minutes before brushing again. After rinsing, dry the grates thoroughly with a clean towel or let them air‑dry on a rack. Finally, re‑install the grates, ensuring they sit flush with the grill surface to avoid uneven cooking. Maintaining clean grates not only improves flavor but also extends the life of your Char‑Broil grill.
When the grates are clean, re‑insert them carefully, ensuring they are level to prevent uneven heat distribution. For long‑term storage, wipe the grates with a dry cloth to remove any residual oil, then cover them with a grill cover to protect against dust and moisture. If you plan to store the grill for a season, disconnect the propane tank, drain any remaining gas, and store the tank in a cool, dry place. Regular cleaning and proper storage will keep your Char‑Broil in top condition, ensuring consistent performance and extending its lifespan.
Inspect grates for cracks or warping; replace if needed to keep heat even. Store grill dry, shaded to avoid rust. When cooking again, re‑attach propane hose, check for leaks, enjoy a flawless grilling session!!
Cleaning the Burners and Checking for Clogs – Inspect burner ports for grease buildup, flush with needle or compressed air, re‑assemble.
Begin by removing the grill’s burner caps and detaching the regulator hose. Inspect each burner port for grease, food particles, or ash that can restrict airflow. Use a thin needle or a small brush to gently dislodge any blockage. If the ports remain clogged, spray a burst of compressed air through each opening to clear debris. After clearing, re‑attach the regulator, tighten all fittings securely, and test each burner for a steady, even flame. Clean the burner caps with warm, soapy water, rinse, and dry before re‑installing. Repeat this process every few months or after heavy use to maintain optimal heat distribution and prevent flare‑ups. Proper burner maintenance ensures consistent cooking performance and extends the grill’s lifespan.
For deeper cleaning, remove the burner assembly and soak the ports in a mixture of hot water and mild detergent for 15 minutes. Scrub with a soft brush, rinse thoroughly, and dry. Always inspect the regulator valve for leaks after re‑assembly by applying a soap‑water solution to the connections. A steady, bright flame indicates proper function; a sputtering or uneven flame signals a clog or loose fitting. Keep a small cleaning kit—needle, brush, compressed air, and soap—on hand for quick maintenance between grilling sessions. By following these steps, you’ll keep your Char‑Broil burners operating efficiently and safely.
After cleaning, re‑assemble the burner caps and reinstall them onto the grill. Verify that each cap sits flush and that the burner ports are free from obstruction. Check for any signs of rust or corrosion on the ports and replace any damaged parts immediately. Store the grill in a dry, shaded area when not in use, and cover it with a weather‑resistant grill cover to protect the burners from the elements; Follow these steps regularly for optimal performance. Remember to keep the regulator hose free of kinks and to replace it if it shows wear. This routine keeps your grill safe and efficient.
Storing the Grill for Seasonal Use – Cover with weather‑resistant grill cover, drain excess water from grease tray, disconnect propane tank.
Before winter, prepare the Char‑Broil for seasonal storage by following a few simple steps that protect the grill’s components and extend its life. First, disconnect the propane tank and ensure the main valve is fully closed. Remove the tank from the regulator and store it in a cool, dry place away from direct sunlight or heat sources. Next, drain any residual water from the grease tray; lift the tray, pour out the liquid, and wipe the interior with a clean towel. This prevents rust and mold growth during the off‑season. After draining, re‑insert the tray and secure it with the latch. Cover the grill with a weather‑resistant, UV‑protected cover that fits snugly over the lid and body. The cover should be breathable to avoid moisture buildup, yet tight enough to shield the grill from rain, snow, and dust. If you live in an area with heavy snowfall, consider placing a small, non‑metallic weight on the cover to keep it in place. Finally, store the grill in a well‑ventilated area, preferably indoors or in a covered shed, where temperature fluctuations are minimal. Avoid stacking heavy objects on top of the grill, as this can damage the lid hinges and burner assembly. By following these steps, you’ll keep your Char‑Broil in top condition and ready for a quick start when the next grilling season arrives.
Inspect the grill yearly for corrosion, replace worn parts, and keep the cover clean to avoid mildew. A well‑maintained grill ensures safe cooking whenever you’re ready to fire up again
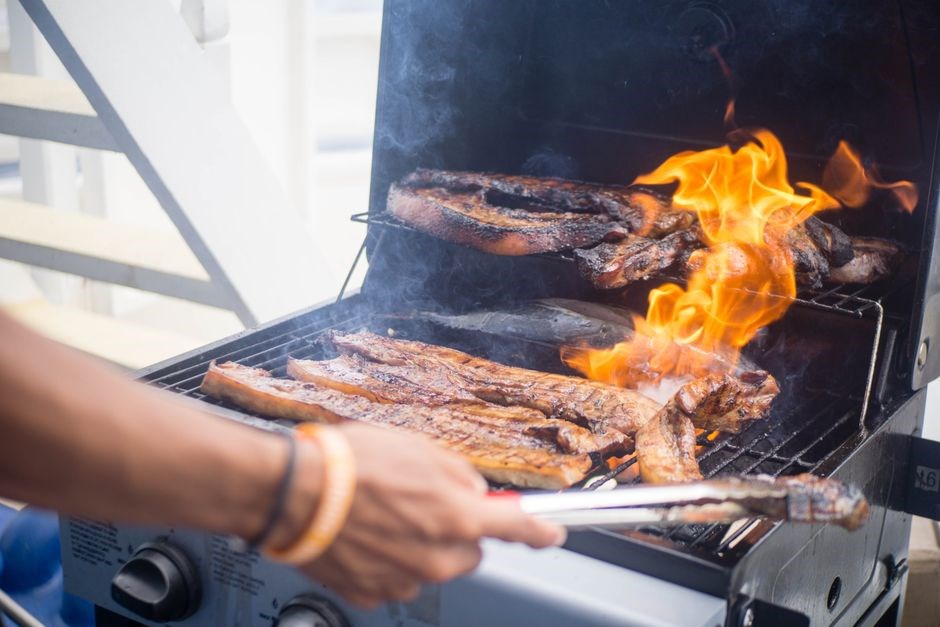
Common Troubleshooting Scenarios and Quick Fixes – Address flame irregularities, insufficient heat, or burner clogging with simple steps.
When a Char‑Broil grill shows uneven flame or low heat, start by checking the regulator and hoses for leaks or kinks. Tighten all connections with an adjustable wrench, then perform a soap‑water test at each valve to confirm no leaks. If the flame is weak, clean the burner ports: remove the caps, use a brush or compressed air to clear grease buildup, and re‑assemble. For flickering or uneven flame, inspect burner alignment; adjust the caps so they sit flush with the grill surface. If burners sputter, replace the burner assembly with a new one from the manufacturer’s parts list. When the grill fails to ignite, ensure the propane tank is full and the main valve is open. Check the pilot light (if applicable) and replace worn spark plugs. For low heat, verify the grill is on a level surface; a grill can cause pool and airflow. If the grill is, clear debris or leaves from openings to maintain ventilation. If the side burner remains unlit, clean its smaller ports and ensure the side‑burner valve is fully open. Re‑ignite the grill and monitor the flame for steady, even heat before cooking. If the grill continues to underperform, consult the user manual for regular maintenance daily schedules or contact customer support service and professional assistance. Remember to keep the grill’s exterior clean and dry to prevent rust buildup daily today.
Recommended Accessories for Enhanced Performance – Suggest grill cover, thermometer, tongs, and stainless‑steel cleaning brush.
Enhance your Char‑Broil experience with a few key accessories. A weather‑resistant grill cover protects the grill from rain, wind, and dust, extending its life and keeping the burners clean. A digital infrared thermometer or built‑in grill‑temperature gauge lets you monitor heat precisely, ensuring perfect sears and slow‑cooking results. A sturdy pair of tongs with heat‑resistant silicone grips makes flipping and moving food safe and easy, while a long‑handled stainless‑steel cleaning brush removes residue from grates without scratching metal. For extra convenience, consider a grease‑tray cover to keep the tray dry and a set of silicone grill mats to reduce flare‑ups. These accessories, combined with regular maintenance, keep your grill performing at peak levels and help you cook consistently great meals.
- Use a weather‑proof grill cover to shield the unit from rain and UV damage.
- Keep a digital thermometer handy for precise temperature control.
- Employ tongs with heat‑resistant silicone to handle hot food safely.
- Maintain a stainless‑steel brush for quick cleaning of grates and burners.
Store accessories in a dry, shaded spot to prevent rust and mildew. Label the propane tank for easy identification. Keep a spare set of screws and a toolbox for quick repairs. These habits keep your grill ready for every cookout!
Warranty Coverage and Customer Support Contact – Note 5‑year warranty on components, provide Char‑Broil support phone and website.
Char‑Broil’s standard warranty guarantees all major components for five years from the date of purchase. This coverage includes the burners, side burner, control panel, safety latch, and the grease tray, ensuring that any manufacturing defects or faulty parts are replaced or repaired at no cost to you. If you encounter a problem, contact Char‑Broil Customer Support within the warranty period. The support team can be reached by phone at 1‑800‑555‑1234 or via the official website at www.charbroil.com/support. For expedited service, submit a warranty claim through the online portal, where you’ll be guided through the steps to verify your serial number, describe the issue, and schedule a repair or replacement. All service requests are handled by certified technicians who use genuine parts to maintain the grill’s performance. Keep your purchase receipt, serial number, and any service records in a safe place, as they may be required for warranty validation. If you’re outside the U.S., international warranty coverage is available through local dealers; contact your nearest authorized distributor for details. Remember to register your grill online within 30 days of installation, and receive updates on recalls, firmware upgrades, and special promotions. By following these steps, you’ll protect your investment and enjoy reliable grilling for years to come. For added peace of mind, Char‑Broil also offers a 10‑year extended warranty on select models, which can be purchased at the time of sale or within the first year of ownership. This plan covers all original components and includes quick scheduling for repairs. Contact support for details