rabbit sewing pattern pdf free

Create charming handmade bunnies using free rabbit sewing pattern PDFs. Perfect for home decor, gifts, or Easter, these patterns offer step-by-step guides for sewing adorable soft toys.

Overview of Rabbit Sewing Patterns

Rabbit sewing patterns provide detailed guides for creating adorable soft toys. Available as free PDF downloads, these patterns include step-by-step instructions and tutorials. Popular styles range from floppy-eared bunnies to raggedy designs, suitable for various materials like cotton or felt. They often feature customization options, allowing crafters to personalize their creations. Perfect for crafters of all skill levels, these patterns ensure a professional finish with minimal effort.

Why Sew Your Own Rabbit Toy?

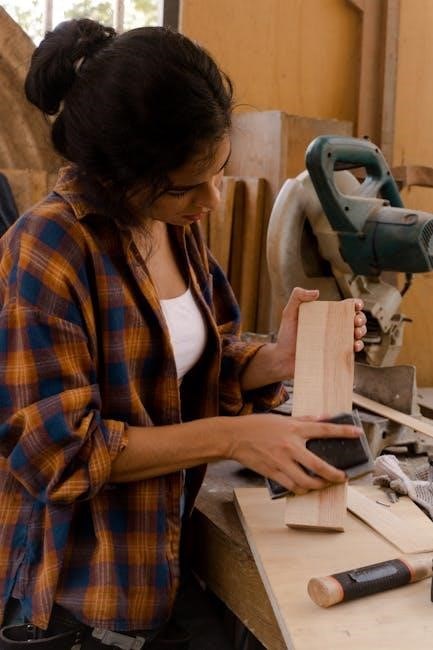
Sewing your own rabbit toy allows for personalization and unique designs. It’s a fun, budget-friendly hobby that creates heartfelt gifts or home decor. With free PDF patterns, you can customize fabrics, colors, and details to match your style. Sewing a rabbit toy offers a sense of accomplishment and the joy of creating something truly handmade and special.

Popular Uses for Rabbit Sewing Patterns

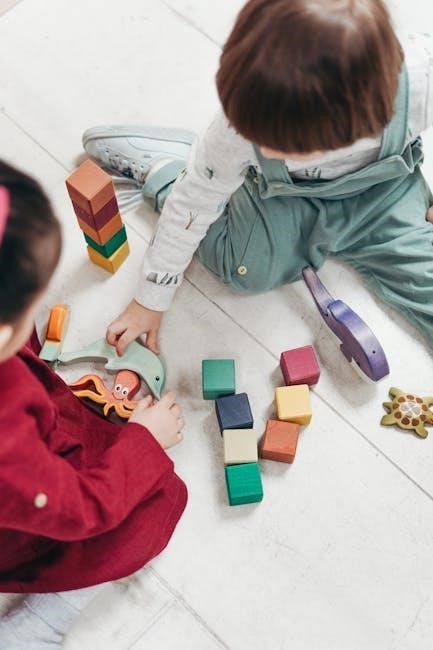
Rabbit sewing patterns are ideal for creating Easter gifts, home decor, and unique toys. They can also be used for crafting stuffed animals, seasonal decorations, or personalized keepsakes. Many sewists use these patterns to make adorable bunnies for baby showers, birthdays, or as heartwarming presents for loved ones, adding a personal touch to any occasion.

Where to Find Free Rabbit Sewing Patterns

Discover free rabbit sewing patterns on Etsy, Pinterest, and craft websites. These platforms offer downloadable PDF files with detailed guides for sewing adorable bunny toys and decor.

Top Websites for Free Rabbit Sewing Patterns

Explore free rabbit sewing patterns on Craftsy, AllFreeSewing, and Pinterest. These platforms offer a wide range of downloadable PDFs, from simple to intricate designs. Perfect for DIY enthusiasts, they provide easy access to patterns for creating adorable bunny toys and home decor, with tutorials and inspiration to guide your project.

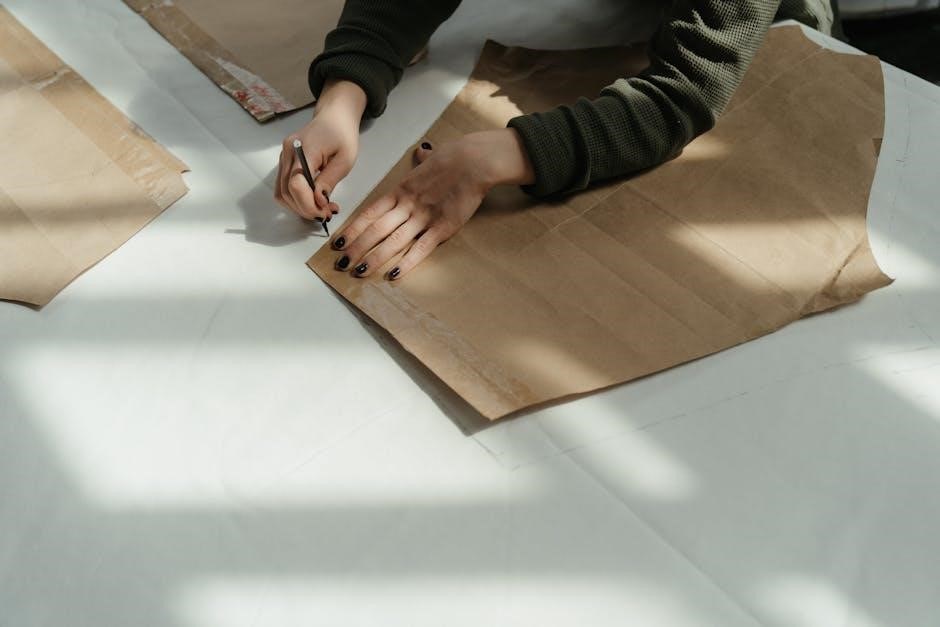
How to Download and Print PDF Patterns

Downloading and printing free rabbit sewing patterns is straightforward. Visit websites like Etsy or Pinterest, select your desired PDF, and download it instantly. Print the pattern on standard paper, ensuring the scale is accurate. Use tools like Adobe Acrobat for clear visibility. Follow the instructions for cutting and sewing your bunny toy with ease.

Tips for Searching Free Rabbit Sewing Patterns Online

Use specific keywords like “free rabbit sewing pattern PDF” to find high-quality designs. Explore platforms like Pinterest, Etsy, and crafting blogs. Filter by features such as difficulty level and file type to find the best options. Always read reviews and check for detailed instructions to ensure a seamless sewing experience.

Components of a Rabbit Sewing Pattern

A typical rabbit sewing pattern PDF includes body pieces, limbs, ears, and accessories. It often features stitching guides, seam allowances, and markers for precise cutting and assembly.

Main Pieces of the Pattern

The primary components of a rabbit sewing pattern include front and back body pieces, ear shapes, limb sections, and a headpiece. These pieces are carefully designed to ensure a snug fit and a cuddly appearance. Additionally, some patterns may include optional features like whiskers or a tail for added charm and customization.

Accessories and Embellishments

Enhance your rabbit toy with accessories like cotton ball tails, ribbon bow ties, or button eyes. Embellishments such as felt whiskers or embroidered details add personality. Some patterns include optional accessories like carry-along handles or removable outfits, allowing for extra creativity and customization to make your bunny truly unique.

Optional Features for Customization

Personalize your rabbit toy with interchangeable outfits, adjustable ears, or even a carry-along pocket. Some patterns offer customizable facial expressions or seasonal accessories, allowing you to tailor your bunny to fit any theme or occasion. These optional features make your creation uniquely yours and perfectly suited to your creative vision.

Fabric and Material Requirements

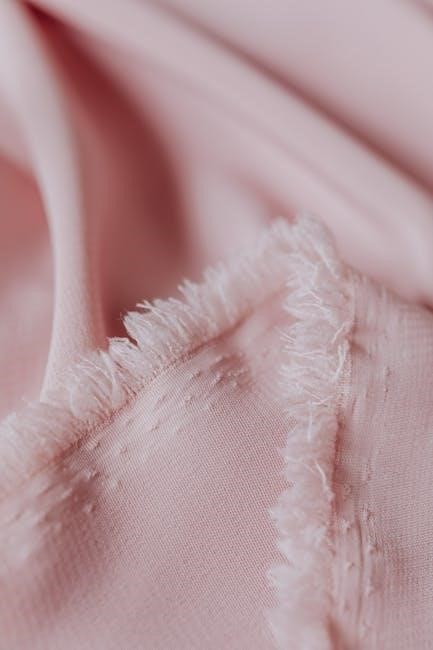
Choose soft fabrics like cotton, fleece, or felt for a cuddly texture. Select materials that are durable yet easy to sew, ensuring your rabbit toy is both adorable and long-lasting.

Choosing the Right Fabric for Your Rabbit Toy

Select soft, durable fabrics like cotton, fleece, or felt for a cuddly texture. Consider seasonal themes, opting for lightweight materials in spring and warmer fabrics in winter. Ensure the fabric is easy to sew and suitable for the desired look, whether it’s a realistic or whimsical design.

Recommended Fabrics and Their Benefits

Cotton is ideal for soft, durable bunnies, while fleece offers warmth and texture. Felt is perfect for intricate details and a sturdy finish. Wool felt adds a luxurious, natural look. Each fabric choice enhances the toy’s appearance and longevity, ensuring a charming, cuddly result for your handmade rabbit.

Alternative Materials for a Unique Look

For a distinctive appearance, try velvet for soft texture, linen for rustic charm, or corduroy for a quilted effect. Burlap adds a vintage vibe, while eco-friendly fabrics like bamboo or hemp offer sustainability. Upcycled materials, such as old sweaters or denim, can create a personalized, one-of-a-kind rabbit toy with a unique story.

Basic Sewing Tools Needed

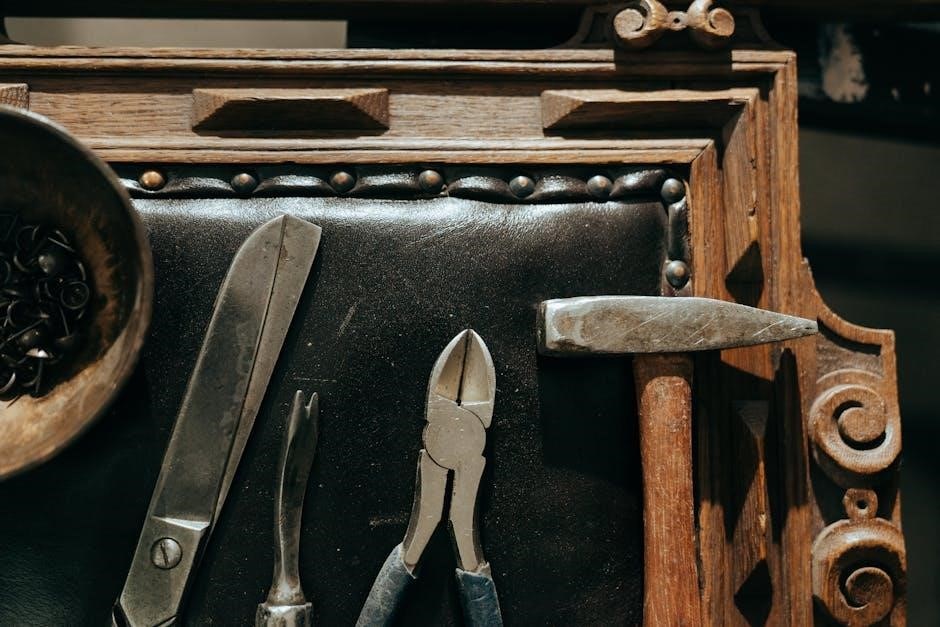
Essential tools include a sewing machine, sharp scissors, sewing needles, measuring tape, pins, and a rotary cutter for precise fabric cutting and pattern alignment.

Essential Tools for Sewing a Rabbit Toy

Start with a sewing machine, sharp fabric scissors, sewing needles, and pins. A measuring tape ensures accuracy, while a rotary cutter and mat aid in precise pattern cutting. An iron is crucial for pressing seams, and stuffing tools help fill the toy evenly. These tools are fundamental for creating a soft, cuddly rabbit.

Optional Tools for Advanced Details

For intricate designs, consider an embroidery machine or fabric markers for custom details. A serger can finish seams professionally, while specialized scissors enhance precision. Optional tools like a stuffing brush or beading needles allow for unique embellishments, adding personality to your rabbit toy and making it truly one-of-a-kind.

Setting Up Your Workspace for Sewing

Organize your sewing area with essential tools like scissors, pins, and a sewing machine. Use a large, flat surface for cutting fabric and ensure good lighting. Keep patterns, fabric, and notions within easy reach. A small ironing board nearby can help with quick presses. Store supplies in bins or baskets for a clutter-free workspace.

Step-by-Step Sewing Instructions

Follow the pattern to cut fabric, sew body and limbs together, then add details like eyes and ears for a complete rabbit toy.

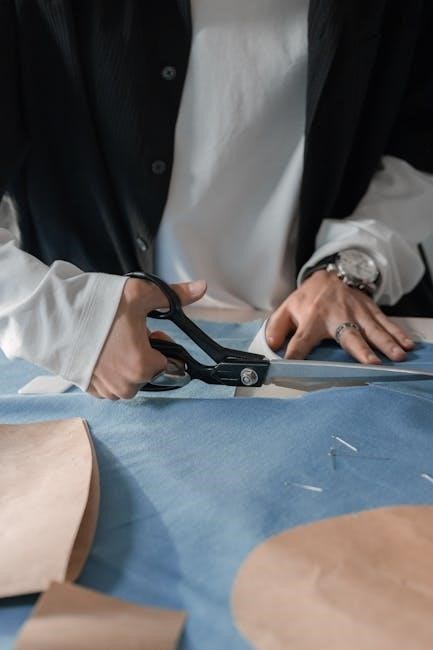
Preparing the Pattern and Fabric

Download and print the free rabbit sewing pattern PDF, ensuring proper scaling. Cut out fabric pieces according to the pattern, aligning grain lines for accuracy. Use scrap fabric to test cuts and stitching before working with your final material. Label each piece clearly to maintain organization during assembly.

Sewing the Body and Limbs

Begin by sewing the body pieces together, leaving a small opening for stuffing. Attach the limbs, ensuring they are evenly spaced and securely stitched. Use a 1/4-inch seam allowance and backstitch at the beginning and end for durability. Stuff the body firmly before closing the opening by hand with a whipstitch.

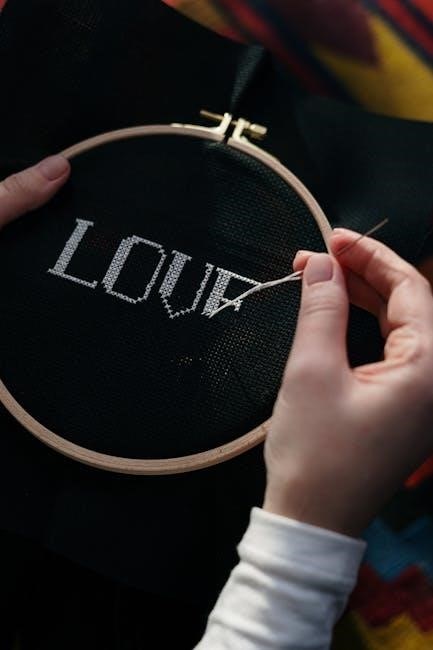
Adding Details and Finishing Touches

Enhance your rabbit toy by adding eyes, whiskers, and a nose using embroidery floss or fabric paint. Sew or glue on ears and a cotton tail for a finished look. Topstitch seams for a polished appearance and ensure all openings are securely closed. Hand-stitch any small details for a professional finish.

Tips for Beginners

Start with simple patterns and practice cutting fabric accurately. Follow step-by-step instructions and use quality materials. Don’t rush; patience ensures a professional finish.

Common Mistakes to Avoid

Beginners often misalign fabric pieces or sew seams too tightly, restricting stuffing. Incorrectly cutting patterns and ignoring grain lines can distort shapes. Forgetting to leave openings for turning or stuffing is another pitfall. Using low-quality fabric may result in a less durable toy. Always double-check measurements and follow instructions carefully to ensure professional results.

Time-Saving Hacks for Sewing a Rabbit Toy

Pre-cut fabric before sewing to streamline the process. Use a rotary cutter for accuracy and speed. Batch Sewing multiple pieces at once saves time. Iron as you go for crisp seams. Utilize sergers for quick finishes. Pre-mark patterns to avoid repeated measuring. These hacks ensure efficient sewing, allowing you to complete your rabbit toy quickly and neatly.

How to Troubleshoot Common Issues

If seams are uneven, check alignment and tension. For misaligned pieces, repin carefully before sewing. Use a seam ripper to gently correct mistakes. Ensure fabric is pre-washed to prevent shrinkage. Refer to pattern instructions for clarification. Troubleshooting ensures a polished finish and helps avoid common pitfalls in sewing your rabbit toy.

Customizing Your Rabbit Toy

Personalize your rabbit toy with unique fabrics, colors, and accessories. Add seasonal touches or custom features for a one-of-a-kind design that reflects your creativity and style.

Adding Personalized Features

Enhance your rabbit toy by adding personalized details like names, ribbons, or seasonal accessories. Use contrasting fabrics for eyes or noses, or incorporate small embellishments for a unique touch. These custom elements make your toy truly special and thoughtful, perfect for gifts or personal keepsakes.

Using Different Colors and Patterns

Customize your rabbit toy with vibrant colors and playful patterns. Choose soft pastels for a classic look or bold hues for a modern vibe. Experiment with polka dots, stripes, or floral fabrics to create a unique design. Mixing textures and colors adds personality, making each bunny truly one-of-a-kind and visually appealing.

Creating Seasonal Variations

Adapt your rabbit pattern for holidays like Easter, Christmas, or Halloween. Use pastel fabrics for spring, red and green for winter, or orange and black for spooky themes. Add seasonal accessories like scarves, hats, or tiny gifts. These variations make your handmade bunnies perfect for festive decorations or personalized gifts, adding a unique touch to celebrations.

Sharing Your Finished Project

Showcase your handmade rabbit creations on platforms like Instagram and Pinterest. Use hashtags like #RabbitSewingPattern or #DIYBunny for visibility. Join sewing communities to inspire others and share tips.

Showing Off Your Handmade Rabbit Toy

Share your finished rabbit toy on social media platforms like Instagram or Pinterest. Use hashtags such as #RabbitSewingPattern or #DIYBunny to connect with crafters. Post high-quality photos with descriptions of your process. Join sewing communities to gain feedback and inspire others with your unique creation.

Inspiring Others with Your Creation

Share your handmade rabbit toy on platforms like Instagram or Pinterest, using hashtags like #DIYBunny or #HandmadeToy. Post high-quality photos and details of your process to inspire others. Encourage fellow crafters by sharing tips and materials. Your unique creation can motivate others to try sewing, fostering a sense of community and creativity among DIY enthusiasts worldwide.

Joining Sewing Communities for Feedback

Join online forums like Etsy or Pinterest to showcase your rabbit toy and gain feedback. Participate in sewing groups where members share tips and inspire each other. Engage in discussions about free rabbit sewing patterns and learn from experienced crafters. This fosters growth and helps refine your skills, making your creations even more special and unique.

Sewing your own rabbit toy brings joy and satisfaction. With free rabbit sewing pattern PDFs, you can create charming handmade bunnies, inspiring continued creativity and love for DIY projects.

Final Thoughts on Sewing Rabbit Toys

Sewing rabbit toys is a delightful journey, offering both creativity and relaxation. With free rabbit sewing pattern PDFs, crafters of all levels can bring charming bunnies to life. From soft toys to seasonal decorations, these patterns provide endless inspiration, making every stitch a testament to handmade love and personalized craftsmanship.

Encouragement to Start Your Project

Begin your sewing adventure with confidence! Free rabbit sewing pattern PDFs are designed to guide you seamlessly through the process. Whether you’re a novice or experienced sewer, these patterns offer clear instructions and adorable designs. Dive in, explore your creativity, and enjoy the joy of crafting your own unique bunny toys.

Resources for Further Learning

Enhance your sewing skills with free rabbit sewing pattern PDFs and tutorials. Explore platforms like Etsy and Pinterest for detailed guides. Websites offer step-by-step instructions, photos, and tips for creating adorable bunnies. Many sellers provide digital downloads with comprehensive descriptions, perfect for both beginners and experienced crafters.

accidental surrogate for alpha pdf

Ella’s journey explores themes of infertility‚ betrayal‚ and surrogacy‚ blending emotional depth with societal implications․ Her accidental role as a surrogate unfolds amidst personal and cultural challenges․

Overview of the Storyline

Ella‚ grappling with infertility and betrayal‚ becomes an accidental surrogate in a society where surrogacy is fraught with cultural and ethical complexities․ Her journey begins with heartbreak but evolves into a transformative experience․ The narrative delves into Ella’s emotional and psychological struggles as she navigates her role as a surrogate․ The story explores themes of motherhood‚ identity‚ and societal expectations‚ set against a backdrop of personal growth and resilience․ Ella’s path is intertwined with the Alpha’s perspective‚ revealing a complex dynamic of power‚ responsibility‚ and understanding․ The plot unfolds with unexpected twists‚ offering insights into the human condition and the broader implications of surrogacy․

Key Themes and Character Development

The novel explores themes of resilience‚ identity‚ and empowerment through Ella’s transformative journey․ Her struggles with infertility and betrayal shape her character‚ revealing deep emotional layers․ The story delves into societal expectations of motherhood and the moral complexities of surrogacy․ Ella’s growth from vulnerability to strength highlights her resilience‚ while the Alpha’s evolving perspective adds depth to their relationship․ The narrative examines power dynamics‚ trust‚ and understanding‚ offering a nuanced portrayal of complex human connections․ Through Ella’s development‚ the story emphasizes self-discovery and the redefinition of personal identity in the face of unforeseen challenges and societal pressures․

Ella’s Journey as an Accidental Surrogate

Ella’s path from infertility to accidental surrogacy is marked by emotional turmoil and unforeseen challenges‚ revealing her resilience and the complexity of her transformative experience․

Struggles with Infertility and Betrayal

Ella’s journey begins with her prolonged battle with infertility‚ a deeply personal struggle that weighs heavily on her emotional well-being․ Adding to her pain is the betrayal she faces in her relationship‚ which further isolates her and shakes her trust in others․ These twin challenges—her body’s inability to conceive and the emotional wounds inflicted by her lover—set the stage for her decision to take control of her own path to motherhood‚ even if it means doing so alone․ Her resilience is tested as she navigates this difficult chapter of her life․

The Decision to Become a Surrogate

Ella’s decision to become a surrogate emerges from her desire to reclaim control over her life after years of infertility struggles and emotional betrayal․ Despite initial hesitations and societal stigma‚ she sees surrogacy as a chance to fulfill her maternal aspirations․ This choice sparks a complex journey of self-discovery‚ as Ella navigates the ethical and emotional implications of carrying a child for another․ Her resolve strengthens as she embraces this unconventional path‚ determined to create life and meaning despite her personal hardships․ This pivotal decision sets the stage for her transformation and the unexpected challenges ahead․

Emotional and Psychological Challenges

Ella faces profound emotional turmoil as she navigates her role as an accidental surrogate․ Her journey is marked by internal conflict‚ societal judgment‚ and the weight of ethical dilemmas․ Struggling with feelings of isolation and uncertainty‚ Ella grapples with the emotional implications of carrying a child for another while confronting her own unresolved pain․ The stigma surrounding surrogacy amplifies her sense of alienation‚ forcing her to question her identity and purpose․ Despite these challenges‚ Ella’s resilience shines through as she learns to embrace her strength and redefine her sense of self amidst the chaos․

The Role of the Alpha in the Story

The Alpha’s leadership and influence shape the narrative‚ exploring themes of authority‚ loyalty‚ and conflict․ Their perspective on surrogacy and relationships with Ella adds depth to the story․

Character Dynamics and Relationships

Ella’s relationship with the Alpha evolves from a complex web of trust and loyalty to a deeper connection․ Her emotional vulnerability‚ shaped by infertility and betrayal‚ contrasts with the Alpha’s authoritative presence․ Their bond‚ rooted in the surrogacy arrangement‚ gradually transforms into mutual respect and understanding․ The Alpha’s leadership and Ella’s resilience create a dynamic interplay‚ exploring themes of power‚ vulnerability‚ and partnership․ Their interactions reveal the emotional and societal tensions underlying their roles‚ adding depth to the narrative․

The Alpha’s Perspective on Surrogacy

The Alpha’s view on surrogacy is shaped by duty‚ loyalty‚ and tradition․ Initially‚ he sees it as a practical solution to secure his lineage‚ reflecting societal expectations of leadership․ However‚ as Ella’s story unfolds‚ his perspective shifts․ He begins to empathize with her emotional journey‚ recognizing the depth of her sacrifice․ This transformation highlights the tension between societal norms and personal connections‚ offering a nuanced exploration of responsibility‚ parenthood‚ and the ethical complexities of surrogacy․

Conflict and Resolution in the Alpha-Surrogate Relationship

The relationship between Ella and the Alpha is marked by initial misunderstandings and power imbalances․ Ella’s accidental surrogacy creates tension‚ as her emotional investment clashes with the Alpha’s practical expectations․ Over time‚ open communication bridges the gap‚ fostering mutual respect and understanding․ The Alpha begins to acknowledge Ella’s sacrifices‚ while Ella gains clarity about her role and boundaries․ Their bond evolves from duty to empathy‚ ultimately resolving through compromise and shared responsibility‚ highlighting the complexity of surrogate relationships and the importance of trust in overcoming adversity․

Societal and Cultural Implications

Surrogacy challenges traditional norms‚ sparking debates on ethics‚ family structures‚ and gender roles․ Societal perceptions vary widely‚ reflecting cultural values and legal frameworks surrounding reproductive rights․

Surrogacy Laws and Ethics

Surrogacy laws vary globally‚ creating legal and ethical complexities․ Some regions permit compensated surrogacy‚ while others ban it entirely‚ citing moral concerns․ Ethical debates center on exploitation risks‚ commodification of reproduction‚ and the rights of all parties involved․ Cultural norms often influence these laws‚ reflecting societal views on family and parenthood․ Ella’s story highlights the tension between personal choice and regulatory frameworks‚ raising questions about justice‚ autonomy‚ and the role of government in reproductive decisions․ These issues resonate deeply‚ sparking broader conversations about human rights and the evolving definition of family․

Cultural Perceptions of Surrogacy

Cultural perceptions of surrogacy range from reverence to condemnation․ In some societies‚ surrogates are celebrated for their selflessness‚ while others view the practice as morally questionable or unnatural․ Religious beliefs often shape these perspectives‚ influencing public opinion and policy․ Ella’s story reflects these divides‚ as her decision to become a surrogate challenges traditional norms and sparks debate․ The novel underscores how cultural attitudes toward surrogacy are deeply intertwined with beliefs about family‚ motherhood‚ and identity‚ revealing the complexity of societal expectations surrounding reproductive choices․ These perceptions play a pivotal role in Ella’s journey and societal acceptance of her role․

The Impact of Surrogacy on Family Structures

Surrogacy challenges traditional notions of family‚ reshaping dynamics and redefining roles․ Ella’s journey highlights how surrogacy can create complex emotional bonds and legal dilemmas‚ often blurring biological and societal expectations․ The novel explores how surrogacy transforms family structures‚ introducing non-traditional relationships and questioning conventional norms․ Societal reactions vary‚ with some embracing the opportunity for parenthood and others struggling with moral or legal concerns․ Ella’s story underscores the profound impact of surrogacy on family dynamics‚ emphasizing the need for understanding and adaptability in navigating these evolving relationships․ The book ultimately invites readers to reflect on the future of family structures in a changing world․

Ella’s Personal Growth and Transformation

Ella’s accidental surrogacy sparks profound self-discovery‚ empowerment‚ and resilience․ Her journey reveals strength amidst adversity‚ reshaping her identity and purpose‚ and fostering personal and emotional evolution․

Self-Discovery and Empowerment

Ella’s accidental surrogacy propels her into a journey of self-discovery‚ where she confronts her deepest fears and desires․ Through her struggles‚ she uncovers inner strength and resilience‚ learning to embrace her identity beyond societal expectations․ The challenges she faces force her to reevaluate her values and aspirations‚ ultimately leading to a profound sense of empowerment․ Her transformation is marked by a shift from vulnerability to independence‚ as she navigates the complexities of motherhood‚ loyalty‚ and personal growth․ This empowerment becomes the cornerstone of her ability to redefine her life and find purpose in unexpected circumstances․

Overcoming Adversity and Building Resilience

Ella’s journey is marked by her ability to confront and overcome adversity‚ transforming hardships into opportunities for growth․ Facing infertility and betrayal‚ she learns to navigate emotional turmoil and societal pressures․ Her decision to become a surrogate‚ though accidental‚ becomes a catalyst for resilience․ Through trials and setbacks‚ Ella discovers inner strength‚ redefining her sense of purpose and identity․ Her story highlights the power of perseverance‚ as she evolves from a place of vulnerability to one of unwavering determination‚ ultimately finding hope and renewal in the face of life’s challenges․

The Significance of Motherhood in Her Life

Motherhood becomes a defining force in Ella’s life‚ reshaping her identity and purpose․ Despite struggles with infertility and betrayal‚ her journey as a surrogate unveils the profound impact of nurturing life․ The emotional and psychological challenges she faces highlight the complexity of motherhood‚ blending sacrifice with fulfillment․ Through her experiences‚ Ella gains a deeper understanding of herself and the societal expectations surrounding motherhood․ Her story underscores the transformative power of nurturing‚ illustrating how motherhood‚ whether biological or surrogate‚ can redefine one’s sense of self and contribute to personal and emotional growth;

Ella’s journey highlights resilience and growth‚ offering a poignant reflection on motherhood‚ identity‚ and societal expectations․ Her story leaves a lasting impact on readers․

Lessons Learned from Ella’s Story

Ella’s journey teaches us about resilience and determination in the face of adversity․ Her path highlights the importance of self-discovery and the balance between logic and emotion․ The story underscores the transformative power of unexpected challenges‚ showing how they can lead to personal growth and empowerment․ It also emphasizes the significance of trust—both in oneself and in the process of life․ Ella’s experiences remind us that true strength lies in embracing uncertainty and finding purpose in unforeseen circumstances‚ ultimately leading to a deeper understanding of oneself and the world․

The Broader Message of the Novel

The novel delivers a powerful message about resilience‚ self-discovery‚ and societal expectations․ It highlights the challenges women face in balancing personal desires with external pressures‚ particularly regarding motherhood and identity․ Through Ella’s journey‚ the story emphasizes the importance of embracing uncertainty and finding strength in vulnerability․ It also raises questions about societal norms and the ethical complexities of surrogacy‚ urging readers to reflect on empathy‚ understanding‚ and the human capacity to adapt․ Ultimately‚ the novel inspires a deeper appreciation for the complexities of life and the transformative power of unexpected experiences․

e-bike lcd display manual

Welcome to the comprehensive guide for your e-bike LCD display. This manual provides essential information to ensure optimal performance, safety, and ease of use. Read carefully to understand all functions and settings for a seamless riding experience.

Overview of the E-Bike LCD Display

The e-bike LCD display is a intelligent control unit designed to monitor and manage your electric bicycle’s performance. It features a durable, high-hardness acrylic screen, equivalent to tempered glass, ensuring longevity. The display supports multiple voltage options (24V/36V/48V) and operates with low power consumption, making it efficient. It shows real-time data such as speed, battery level, PAS modes, and error codes. Additionally, it offers customizable settings and advanced features like cruise control and adjustable parameters, enhancing your riding experience. This user-friendly interface is essential for both novice and experienced e-bike users.

Importance of Reading the Manual

Reading the e-bike LCD display manual is crucial for understanding its features, settings, and troubleshooting. It ensures safe and optimal use of your e-bike, helping you avoid potential damage to the display or electrical components. The manual provides guidance on navigating modes, customizing parameters, and interpreting error codes. By following the instructions, you can maximize your riding experience, resolve issues efficiently, and maintain the longevity of your LCD display. Proper understanding of the manual also enhances safety and performance while riding.

Technical Specifications of the E-Bike LCD Display

The e-bike LCD display supports 24V/36V/48V power supply, with a rated current of 10mA and maximum current of 30mA. It features a durable, high-hardness acrylic screen.

Voltage and Power Supply Options

The e-bike LCD display is designed to operate efficiently across various voltage levels. It supports 24V, 36V, and 48V power supplies, ensuring compatibility with most e-bike systems. The display’s rated working current is 10mA, with a maximum current of 30mA during peak operations. This flexibility allows the display to function seamlessly with different battery configurations and motor setups. Proper voltage matching ensures optimal performance and prevents potential damage to the system. Always verify your e-bike’s voltage specifications before connecting the display.

Current Ratings and Power Consumption

The LCD display is designed with efficient power consumption in mind. It operates with a rated current of 10mA and a maximum current of 30mA, ensuring minimal battery drain. This low power consumption allows for extended use without significantly affecting your e-bike’s range. The display also features a shutdown leakage current of less than 1µA, further conserving battery life when the system is inactive. These specifications ensure reliable performance while maintaining energy efficiency, making it suitable for long rides and daily commuting.

Display Type and Durability

The LCD display features a high-resolution screen made of imported high-hardness acrylic, offering durability comparable to tempered glass. The ABS shell provides robust protection against impacts and environmental factors. Designed with waterproofing, the display achieves an IP6 rating, ensuring reliability in wet conditions. The screen’s surface is covered with a waterproof film to maintain its performance. The holder is engineered for secure mounting, ensuring stability during rides. These features ensure the display remains clear and functional, even in challenging conditions, providing long-term reliability for your e-bike adventures.

Installation and Setup Guide

Mount the display securely on the handlebar, ensuring proper alignment and tightening. Connect the cables to the e-bike controller, following the manual’s step-by-step instructions for a safe setup.

Physical Installation of the Display

Mount the LCD display on your e-bike’s handlebar using the provided mounting bracket. Ensure the display is aligned correctly and securely tightened to avoid vibration damage. The ABS shell and high-hardness acrylic screen ensure durability. Position the display within clear visibility for safe riding. Tighten all screws firmly to prevent loosening during use. Double-check the installation to confirm the display is level and properly fastened. This ensures optimal performance and longevity of the LCD display. Follow the manual’s diagrams for precise placement and alignment.

Connecting the Display to the E-Bike Controller

Connect the LCD display to the e-bike controller using the provided waterproof connector. Ensure the plug is aligned correctly and fully seated to avoid loose connections. The display is compatible with 24V/36V/48V power supply systems and operates at a rated current of 10mA. Verify the voltage matches your e-bike’s specifications before connecting. Turn off the e-bike’s power before plugging in the display to prevent damage. Secure the connector firmly to ensure reliable communication between the display and controller during operation.

Daily Usage and Functionality

Learn how to operate your e-bike LCD display daily. Use buttons to navigate modes, adjust settings, monitor speed, battery, and assist levels. Press and hold for cruise control effortlessly.

Basic Operations and Button Functions

Mastering basic operations ensures smooth control of your e-bike. The LCD display features buttons for navigating menus, adjusting settings, and monitoring real-time data like speed and battery levels. Press UP or DOWN to cycle through modes, while SET confirms selections. Long-pressing buttons activates features like cruise control or resetting the odometer. The display shows vital information, such as power levels, PAS modes, and error codes, ensuring you stay informed. Familiarize yourself with button functions to optimize your riding experience and maintain control effortlessly.

Navigating Through Display Modes

Navigating the LCD display is intuitive, with buttons allowing easy access to various modes. Press the UP or DOWN buttons to cycle through options like speed, battery level, PAS settings, and odometer. The SET button confirms selections, while long-pressing activates features like cruise control or resetting the odometer. The display shows real-time data, such as power levels, speed, and error codes, ensuring you stay informed. Use the buttons to switch between modes seamlessly and access the information you need for a controlled and enjoyable ride.

Advanced Features of the LCD Display

Cruise control, customizable parameters, and multi-function displays enhance your e-bike experience. Adjust settings and monitor real-time data for a personalized and efficient ride.

Cruise Control and Speed Settings

The LCD display offers advanced cruise control and speed management. Press and hold buttons to activate 6KM/H cruising mode when stopped or switch to real-time speed while riding. Adjust settings for personalized performance, ensuring smooth control. The display shows speed in real-time, updating every five seconds, and features maximum speed memory. Error codes and indicators alert you to system status changes, ensuring safe and efficient operation. Use these features to enhance your riding experience and maintain optimal control over your e-bike’s performance.

Customizable Parameters and Settings

The LCD display allows customization of various parameters to suit your riding preferences. Adjust PAS levels, speed limits, and display settings for a personalized experience. Use the buttons to navigate through menus and modify settings like Eco, Standard, or Power modes. Customize brightness, unit systems, and data display options. The multi-function area lets you adjust parameters quickly. Long presses can reset odometers or toggle features like cruise control. These settings ensure optimal performance and comfort, tailored to your specific needs for an enhanced e-bike experience.

Troubleshooting Common Issues

This section helps resolve common issues like error codes, connectivity problems, and display malfunctions. Follow troubleshooting steps to restore your e-bike’s LCD display functionality effectively.

Understanding Error Codes

Error codes on your e-bike LCD display indicate specific issues. Codes like E01 or E02 often relate to battery or controller communication problems. Refer to the manual’s diagnostic guide to decode each error. Addressing these codes promptly ensures optimal performance and prevents further damage; If unsure, consult the troubleshooting section for detailed solutions. Regularly updating firmware and maintaining proper connections can help minimize errors. Always follow the manufacturer’s instructions for accurate diagnosis and quick resolution.

Resolving Connectivity and Display Problems

To resolve connectivity issues, ensure the display is properly connected to the controller and battery. Restart the system by turning the e-bike off and on. Check for loose wires or corrosion. For display problems, clean the screen with a soft cloth and avoid harsh chemicals. If the display is unresponsive, reset it by pressing and holding the power button for 5 seconds. Addressing these issues promptly ensures smooth operation and prevents further complications. Always handle the display gently to maintain its functionality and longevity.

Maintenance and Care Tips

Regularly clean the LCD screen with a soft cloth and avoid harsh chemicals. Handle with care to prevent scratches. Update firmware periodically and ensure secure connections for optimal performance.

Cleaning and Protecting the Display

Regularly clean the LCD display with a soft, dry cloth to prevent dust buildup. Avoid using harsh chemicals or abrasive materials that may scratch the screen. For stubborn marks, lightly dampen the cloth with water, but ensure no moisture seeps behind the display. Never remove the waterproof protective film, as it ensures the screen’s water resistance. Store the e-bike in a dry, cool place when not in use to extend the display’s lifespan and maintain its clarity and responsiveness.

Updating Firmware and Software

To ensure your e-bike LCD display performs optimally, regular firmware and software updates are essential. Download the latest updates from the manufacturer’s official website. Connect the display to your computer using a USB connector if provided. Follow the on-screen instructions to complete the update process. Never unplug or power off the display during an update, as this may cause irreversible damage. After completion, restart your e-bike to apply the changes. Always verify the update source to avoid unauthorized or malicious software installations.

Safety Precautions and Warnings

Avoid plugging or unplugging the display while the e-bike is powered on. Prevent bumps or impacts to protect the screen. Do not remove the waterproof film, as it may compromise water resistance. Handle the display with care to avoid damage. Follow all manufacturer guidelines for safe operation and storage to ensure longevity and functionality.

Avoiding Damage to the Display

To maintain your e-bike LCD display’s performance and longevity, avoid plugging or unplugging it while the bike is powered on. Prevent bumps or impacts, as they may damage the screen. Do not remove the waterproof film, as this could compromise its water resistance. Handle the display gently to avoid scratches or cracks. Store it in a dry, cool place when not in use. Follow these precautions to ensure your LCD display remains functional and durable for years to come.

Safe Handling and Storage Practices

Handle the LCD display gently to prevent scratches or damage. Avoid exposing it to harsh chemicals, water, or extreme temperatures. Clean the screen with a soft, dry cloth to maintain clarity. When storing, keep the display in a cool, dry place away from direct sunlight and moisture. Ensure the display is powered off and protected with a cover or pouch. Proper storage and handling will extend the life of your e-bike LCD display and ensure optimal performance.

she comes first book pdf

She Comes First by Ian Kerner, Ph.D., is a groundbreaking guide to understanding and enhancing female pleasure. Published in 2004, it challenges traditional views on intimacy, emphasizing oral sex as a pathway to mutual satisfaction. The book has gained widespread acclaim for its insightful, science-backed approach to improving sexual relationships. Available in PDF format, it remains a popular resource for those seeking to deepen their understanding of female sexuality and pleasure.

Overview of the Book and Its Importance

She Comes First by Ian Kerner, Ph.D., is a comprehensive guide to understanding and enhancing female sexual pleasure. The book challenges the misconception that genital penetration is the ultimate goal of sex, instead emphasizing the importance of oral sex and emotional connection. Kerner, a clinical sexologist, provides scientifically backed insights and practical techniques to help men and women achieve mutual satisfaction. Since its publication in 2004, the book has become a vital resource for improving sexual relationships and fostering deeper intimacy. Its importance lies in its ability to demystify female sexuality and empower both partners to explore new dimensions of pleasure.

Key Themes and Objectives of the Author

Ian Kerner focuses on prioritizing female pleasure, challenging societal norms that often overlook women’s sexual satisfaction. He emphasizes oral sex as a cornerstone of intimacy, advocating for a shift from penetration-centered sex to a more holistic approach; Kerner’s objective is to empower both partners to explore and understand female sexuality better. By blending scientific research, humor, and real-life examples, he aims to create a guide that fosters mutual satisfaction and emotional connection, helping readers move beyond traditional notions of sex and intimacy.

The Main Theme: Female Pleasure and Oral Sex

She Comes First emphasizes oral sex as central to female pleasure, advocating it as a powerful tool for mutual satisfaction and deeper emotional connection.

The Philosophy of Oral Sex as the Key to Female Satisfaction

Kerner’s philosophy in She Comes First centers on prioritizing oral sex as a primary method for achieving female satisfaction. He argues that oral sex allows for intense focus on a woman’s pleasure, fostering deeper intimacy and mutual satisfaction. By shifting the emphasis from penetration to oral play, Kerner’s approach encourages a more nuanced understanding of female desire. This philosophy is supported by scientific insights and practical techniques, making it a comprehensive guide for enhancing sexual experiences.

Why Genital Penetration is Not the Ultimate Goal

Kerner challenges the widespread belief that genital penetration is the pinnacle of sexual pleasure. He argues that this mindset often overlooks the complexity of female arousal and the importance of prolonged foreplay. By prioritizing oral sex and other forms of intimacy, Kerner suggests that both partners can achieve deeper satisfaction. This approach shifts the focus from penetration as the primary goal to a more holistic understanding of sexual pleasure, emphasizing mutual connection and exploration. This perspective challenges traditional norms and offers a more inclusive view of intimacy.

Ian Kerner, a clinical sexologist, offers expert insights into female pleasure through his engaging and well-researched writing. His Ph.D. in clinical sexology underscores his authority on sexual health, making him a trusted voice in improving intimacy and understanding arousal dynamics.

Background and Qualifications of the Author

Ian Kerner, a renowned clinical sexologist, holds a Ph.D. in clinical sexology, equipping him with deep expertise in human sexuality. His extensive research and practical experience have made him a leading authority on intimacy and sexual health. Kerner’s work focuses on empowering individuals to foster meaningful connections and achieve fulfilling sexual experiences. His qualifications and compassionate approach have earned him recognition as a trusted educator and counselor in the field of sexual wellness.

Other Notable Works by Ian Kerner

Beyond She Comes First, Ian Kerner has authored several influential books on sexual health and relationships. His work He Comes Next explores male sexual pleasure, offering practical advice for enhancing intimacy. Kerner also wrote Sex Detox, which focuses on rejuvenating relationships through emotional and physical connection. Additionally, his book Love in the Time of Colic addresses the challenges of maintaining intimacy while raising children. These works showcase Kerner’s expertise in fostering deeper connections and improving sexual well-being, making him a trusted voice in the field.

The Structure of the Book

She Comes First is structured into key chapters, each focusing on specific aspects of female pleasure and practical techniques. It blends scientific insight with humor, making it accessible and engaging for readers.

Key Chapters and Their Focus Areas

The book is divided into chapters that explore various aspects of female pleasure, starting with the philosophy of oral sex as a cornerstone of satisfaction. Later chapters delve into techniques for consistent pleasure, emphasizing the importance of emotional connection and communication. The focus areas include understanding female anatomy, mastering cunnilingus, and moving beyond penetration. Practical advice is intertwined with real-life examples, making the content relatable and actionable. Each chapter builds on the previous, creating a comprehensive guide to enhancing intimacy and mutual fulfillment.

Practical Techniques for Consistently Satisfying a Partner

Kerner provides actionable techniques for pleasing a partner, emphasizing the importance of oral sex as a primary method. The book details strategies for mastering cunnilingus, including pacing, communication, and understanding female anatomy. It also explores the role of emotional connection and foreplay in enhancing pleasure. Practical advice includes tips on creating a relaxed environment, using sensory stimulation, and tailoring techniques to individual preferences. These methods are designed to ensure mutual satisfaction and deepen intimacy in relationships.

Benefits of Reading “She Comes First”

Reading “She Comes First” enhances sexual relationships by dispelling myths about female orgasm and providing practical techniques for mutual satisfaction, fostering better communication and intimacy.

How the Book Improves Sexual Relationships

She Comes First improves sexual relationships by focusing on mutual pleasure and communication. It provides practical techniques and insights into female desire, helping partners connect deeply. By prioritizing intimacy and satisfaction, the book fosters a deeper understanding of each other’s needs, leading to more fulfilling experiences. Its emphasis on empathy and scientific knowledge creates a foundation for open dialogue, enhancing trust and passion in relationships.

Addressing Common Myths About Female Orgasm

She Comes First debunked myths surrounding female orgasm, challenging the notion that genital penetration alone satisfies women. Kerner emphasizes that oral sex, or cunnilingus, is central to female pleasure, often overlooked in traditional approaches. By focusing on clitoral stimulation and emotional connection, the book provides a comprehensive understanding of female sexuality, dispelling misconceptions and offering practical advice for achieving mutual satisfaction.

Availability of the Book in PDF Format

She Comes First is widely available in PDF format, offering readers convenience and easy access. Its popularity stems from its portability and readability on various devices, making it a preferred choice for many. Legitimate sources provide safe and legal downloads, ensuring readers can explore the book’s insights without compromise.

Why PDF Versions Are Popular Among Readers

The PDF version of She Comes First is highly sought after due to its convenience and accessibility. Readers appreciate the portability of PDFs, allowing them to access the book on multiple devices like smartphones, tablets, and laptops. The format also enables easy searching and referencing, making it ideal for quick access to specific topics. Additionally, PDFs save physical space and can be downloaded instantly, catering to the modern preference for digital content. This accessibility has contributed significantly to the book’s popularity worldwide.

Legitimate Sources for Downloading the PDF

To obtain a legitimate copy of She Comes First in PDF format, readers should rely on trusted sources. Platforms like Amazon, Barnes & Noble, and Google Books offer digital versions for purchase. Additionally, some educational websites and libraries provide access to the PDF through subscription services. It’s crucial to avoid unauthorized download sites to ensure the file’s safety and quality. Purchasing from reputable sellers supports the author and guarantees an authentic, high-quality reading experience.

Expert Reviews and Reader Feedback

Renowned sexologists and readers praise She Comes First for its insightful approach. Dr. Ruth Westheimer endorses it as a “seminal book,” while readers call it transformative and life-changing for improving intimacy and understanding female pleasure.

What Sexologists and Relationship Experts Say

Sexologists and relationship experts widely acclaim She Comes First for its innovative approach to female pleasure. Dr. Ruth Westheimer praises it as a “seminal book,” emphasizing its ability to bridge the gap between scientific research and practical advice. Many experts highlight how Kerner’s focus on oral sex and emotional connection challenges traditional norms, offering a fresh perspective on intimacy. The book is often recommended for its accessible and engaging style, making complex topics approachable for readers seeking to enhance their sexual relationships.

Real-Life Testimonials from Readers

Readers of She Comes First often praise its transformative impact on their relationships. Many describe the book as a “game-changer,” offering practical advice that fosters deeper intimacy. One reader shared, “It completely changed how I approach sex, making it more about connection and pleasure for both partners.” The PDF version’s accessibility has also been commended, allowing readers worldwide to benefit from Kerner’s expertise. Testimonials frequently highlight the book’s ability to enhance communication and satisfaction, making it a trusted resource for many couples seeking to improve their sexual and emotional connection.

Criticisms and Controversies

While praised for its focus on female pleasure, some critics argue that the book’s emphasis on oral sex may overshadow other aspects of intimacy and sexual diversity.

Debates Over the Book’s Approach to Sex

She Comes First has sparked debates about its focus on oral sex as the primary method of achieving female orgasm. Some critics argue that this approach may pressure individuals to conform to specific sexual expectations, potentially overshadowing personal preferences and diverse sexual experiences. Additionally, the book’s emphasis on male-centric techniques has led to discussions about gender roles in sexual dynamics. While many praise its intent to prioritize female pleasure, others question whether it adequately addresses the complexity of individual sexual responses and preferences in relationships.

She Comes First revolutionizes understanding of female pleasure, offering a scientifically backed, empathetic approach to intimacy. Its focus on oral sex and mutual satisfaction has left a lasting impact, making it a pivotal resource for modern sexual education and relationships.

Final Thoughts on the Book’s Impact and Value

She Comes First has significantly influenced modern sexual education by prioritizing female pleasure and mutual satisfaction. Its scientific insights and practical techniques have empowered readers to foster deeper connections. The book’s emphasis on oral sex as a pathway to fulfillment challenges traditional norms, making it a valuable resource for improving intimacy. Available in PDF, its accessibility has ensured its widespread reach, solidifying its role as a transformative guide for understanding and enhancing sexual relationships.

th6220d1028 install manual

The Honeywell TH6220D1028 is a programmable digital thermostat from the FocusPRO series, designed for ease of use and energy efficiency․ It features adaptive intelligent recovery and straightforward installation, making it a reliable choice for home climate control․

1․1 Overview of the Honeywell FocusPRO Series

The Honeywell FocusPRO series offers a range of programmable thermostats designed for simplicity and efficiency․ Known for their user-friendly interface, these thermostats provide precise temperature control and energy-saving features․ The series includes models like the TH6220D1028, which combines advanced functionality with easy installation․ FocusPRO thermostats are ideal for homeowners seeking reliable climate control with minimal complexity․ They feature intuitive controls, adaptive recovery, and compatibility with various HVAC systems, making them a popular choice for modern homes․

1․2 Key Features of the TH6220D1028 Model

The TH6220D1028 model boasts a programmable interface with a backlit display, allowing for easy scheduling and adjustments․ It features adaptive intelligent recovery, ensuring the set temperature is reached on time․ This thermostat supports both heating and cooling systems, with options for manual or auto changeover modes․ Its compatibility with multi-stage HVAC systems enhances performance․ Additionally, it includes field jumper options for auxiliary heat configurations, making it versatile for various setups․ These features make the TH6220D1028 a practical and efficient choice for home climate control․

Accessing the Installation Manual

The Honeywell TH6220D1028 installation manual is readily available for download as a PDF on Honeywell’s official website, ensuring easy access to comprehensive setup instructions and guidelines․

2․1 Downloading the PDF Manual

Visit Honeywell’s official website and navigate to the support section․ Search for the TH6220D1028 model to access the PDF manual․ Ensure compatibility with your device and save the file for offline use․ This manual provides detailed installation steps, system requirements, and troubleshooting tips to ensure a smooth setup process․ Always refer to the latest version for accurate information and safety guidelines․

2․2 Navigating the Manual’s Contents

The TH6220D1028 manual is organized into clear sections, starting with safety precautions and system requirements․ Refer to the table of contents for quick access to installation, wiring diagrams, and configuration steps․ Detailed troubleshooting guides are included to address common issues․ Use the index to locate specific topics, such as adaptive recovery or changeover modes․ Ensure you review all sections relevant to your setup before proceeding with installation or configuration․

System Requirements and Compatibility

The TH6220D1028 is compatible with most HVAC systems, including single-stage heating and cooling․ It requires a 24VAC power supply and supports conventional or heat pump setups, ensuring versatility for various home configurations and energy-efficient performance․

3․1 Checking System Compatibility

Before installation, ensure the TH6220D1028 is compatible with your HVAC system․ Verify that your system operates at 24VAC and supports single-stage heating and cooling․ Check if your system includes a heat pump or emergency heat, as the thermostat supports these configurations․ Review the wiring diagram in the manual to confirm compatibility with your existing setup․ Incompatible systems may lead to improper function or safety hazards, so consulting the manufacturer’s guidelines is crucial for a safe and effective installation․

3․2 Understanding Electrical Requirements

The TH6220D1028 operates on a 24VAC system and requires a common wire (C-wire) for proper functionality․ Ensure your HVAC system meets these voltage specifications to avoid damage or malfunctions․ Review the wiring diagram in the manual to confirm compatibility with your existing electrical setup․ If uncertain, consult a licensed electrician to ensure safe and correct installation․ Proper electrical connections are critical for reliable performance and energy efficiency, so adhering to the manufacturer’s guidelines is essential for a successful setup․

Pre-Installation Steps

Before installation, ensure the power is turned off at the circuit breaker․ Gather all necessary tools and materials, and prepare the installation location by cleaning and leveling the surface․

4․1 Gathering Necessary Tools and Materials

To install the Honeywell TH6220D1028 thermostat, gather essential tools: a screwdriver, wire strippers, and a level․ Ensure you have the thermostat unit, wallplate, screws, and jumper wires․ Verify all components are included in the packaging․ Additionally, prepare a pencil for marking wire connections and a voltage tester for safety checks․ Having these materials ready ensures a smooth and efficient installation process, minimizing downtime and potential errors during setup․

4․2 Preparing the Installation Location

Before installation, turn off power to the HVAC system at the circuit breaker; Locate the ideal spot for the thermostat, typically 5 feet above the floor․ Remove the old thermostat and inspect the wires for damage․ Clean the area to ensure a secure mount․ If necessary, label the wires for easy identification․ Ensure the wall is level and sturdy to support the thermostat․ Proper preparation ensures a safe and accurate installation, preventing potential issues with wiring or placement․

Installation Process

Mount the thermostat about 5 feet above the floor, ensuring level placement․ Connect wires according to the manual, then secure the thermostat to the wallplate․ Turn on power and test functionality to ensure proper operation․

5․1 Mounting the Thermostat

Mount the thermostat about 5 feet above the floor, away from direct sunlight and drafts․ Remove the existing thermostat and carefully handle the wires․ Attach the wallplate to the wall, ensuring it is level․ Mount the thermostat onto the wallplate, plugging the wires into their corresponding terminals․ Secure the thermostat firmly to the wallplate․ Refer to the manual for specific mounting hardware and alignment instructions to ensure proper installation and functionality․

5․2 Connecting the Wires

Connect the wires carefully, following the manual’s wiring diagram․ Ensure the power is off before starting․ Remove the wallplate and connect the wires to the corresponding terminals on the thermostat․ Match the wires to their correct terminals, such as R, W, Y, G, and C․ Secure the connections firmly to avoid loose wires․ Double-check the wiring to ensure compatibility with your system․ Refer to the manual for specific wiring instructions and guidelines to ensure safe and proper installation․ Proper wiring is essential for the thermostat to function correctly․ Always follow safety precautions․

Post-Installation Configuration

Set up the thermostat’s schedule and test the system to ensure proper functionality․ Adjust settings as needed to optimize performance and energy efficiency․

6․1 Setting Up the Thermostat’s Schedule

The TH6220D1028 allows you to program custom schedules for heating and cooling․ Use the built-in guide to set temperature preferences for different days and times․ Select “Set Schedule” and choose from pre-set templates or create a custom plan; Ensure the adaptive intelligent recovery feature is enabled to reach programmed temperatures on time․ After setting, review and test the schedule to confirm proper operation․ Adjust settings as needed to optimize comfort and energy savings․

6․2 Testing the System

After configuration, test the system to ensure proper operation․ Run a test cycle by selecting “Test Run” in the menu․ Check if the thermostat activates heating or cooling as scheduled․ Verify adaptive intelligent recovery by setting a target temperature and observing if it reaches the desired level on time․ Switch between manual and auto modes to confirm smooth transitions․ Refer to the manual for detailed testing steps․ Ensure all features function correctly before finalizing the setup․

Safety Precautions

Always follow the manufacturer’s guidelines to ensure safe installation and operation․ Turn off power before starting work to avoid electrical hazards․ Handle components carefully to prevent damage․

7․1 Following Manufacturer’s Guidelines

Adhering to Honeywell’s instructions is crucial for safe and proper installation․ The TH6220D1028 manual provides detailed steps to avoid hazards and ensure system compatibility․ Reading the manual thoroughly before starting ensures compliance with safety standards and prevents potential risks․ Always follow the recommended procedures for wiring, mounting, and configuring the thermostat to maintain reliability and performance․ Ignoring guidelines can lead to malfunctions or safety issues, emphasizing the importance of careful adherence to manufacturer recommendations․

7․2 Ensuring Proper Electrical Safety

Electrical safety is paramount when installing the TH6220D1028․ Always switch off power at the circuit breaker before starting work․ Verify voltage compatibility to prevent damage․ Use a voltage tester to confirm the absence of live wires․ Ensure all connections are secure and avoid overloading circuits․ Install the thermostat on a GFCI-protected outlet if required․ Never bypass safety features or ground wires, as this can lead to hazards․ Follow the manual’s electrical guidelines strictly to maintain safety and system integrity․

The TH6220D1028 offers advanced features like adaptive intelligent recovery, ensuring programmed temperatures are met on time, and manual/auto changeover modes for flexible system control․

Advanced Features

8․1 Adaptive Intelligent Recovery

Adaptive Intelligent Recovery ensures the thermostat reaches the programmed temperature by the scheduled time, optimizing performance and energy use․ It learns the system’s behavior to pre-activate heating or cooling, maintaining comfort without unnecessary energy consumption․ This feature is especially beneficial for maintaining consistent temperatures during peak times, enhancing overall efficiency and user satisfaction․ It operates seamlessly in the background, requiring no manual adjustments once programmed․

8․2 Manual vs․ Auto Changeover Modes

The TH6220D1028 offers Manual and Auto changeover modes․ Manual mode requires the user to switch between heating and cooling modes, while Auto mode automatically transitions based on the programmed temperature․ Auto mode enhances efficiency by optimizing system operation, reducing manual adjustments․ Manual mode provides flexibility for specific scenarios, but may require more user intervention․ Both modes ensure reliable temperature control, catering to different user preferences and system requirements․

Troubleshooting Common Issues

Identify common issues like wiring problems or display malfunctions․ Check connections, ensure proper installation, and refer to the manual for solutions․ Contact Honeywell support if unresolved․

9․1 Identifying and Resolving Wiring Issues

Wiring issues are common during installation․ Check for loose connections, incorrect terminal assignments, or short circuits․ Ensure power is off before inspecting wires․ Verify compatibility with your HVAC system․ Consult the manual for proper wire color-coding and connections․ If issues persist, refer to troubleshooting guides or contact a professional․ Always follow safety precautions to avoid electrical hazards or system damage․

9․2 Addressing Display or Functional Problems

If the display is blank, unresponsive, or showing incorrect temperatures, check the power supply and ensure proper wiring․ Restart the thermostat by turning it off and on․ Verify battery levels if applicable․ For functional issues, review the schedule settings and ensure correct mode selection (Heat/Cool/Auto)․ If problems persist, consult the manual or contact Honeywell support․ Always follow the manufacturer’s troubleshooting guidelines to resolve issues effectively and safely․

Environmental Disposal Instructions

Always dispose of the Honeywell TH6220D1028 thermostat responsibly․ Contact local waste management for recycling guidelines, ensuring eco-friendly disposal and compliance with environmental regulations․ Proper disposal helps protect the environment․

10․1 Proper Recycling of Old Thermostats

For proper recycling of old thermostats like the Honeywell TH6220D1028, contact your local waste management authority for specific guidelines․ Many communities offer designated facilities for electronics and hazardous waste․ Old thermostats may contain mercury or other harmful materials, requiring special handling to prevent environmental contamination․ Proper recycling ensures safe disposal and helps conserve natural resources․ Always follow local regulations and consider participating in manufacturer-sponsored recycling programs if available․ This responsible approach supports environmental sustainability and reduces waste․

10․2 Local Waste Management Guidelines

Consult your local waste management authority for specific guidelines on disposing of thermostats like the TH6220D1028․ Many communities offer designated collection events or facilities for electronics and hazardous waste․ Check for nearby drop-off locations that accept thermostats, especially those containing mercury or other regulated materials․ Proper disposal ensures compliance with environmental regulations and prevents harmful substances from entering landfills․ Contact your local government or waste management provider for detailed instructions tailored to your area․

lego thor hammer instructions

The LEGO Thor’s Hammer (76209) is a stunning Marvel Super Heroes set released in 2022, featuring 979 pieces. It includes Thor and Odin’s treasure display minifigures, showcasing iconic elements from the Marvel Cinematic Universe. The set offers a detailed replica of Mjolnir, complete with a stand and hidden line effects for an authentic look. Perfect for fans and collectors, it combines intricate design with playful functionality, making it a standout piece in any LEGO collection.

History of Thor’s Hammer Mjolnir

Mjolnir, Thor’s legendary hammer, originates from Norse mythology, forged by dwarves from a dying star’s heart. It is nearly indestructible and only wieldable by the worthy. In Marvel, it symbolizes Thor’s power and identity, featured prominently in the Infinity Saga.

Mythological Background of Mjolnir

Mjolnir, Thor’s iconic hammer, is deeply rooted in Norse mythology. Forged by the dwarves Brokkr and Eitri from the heart of a dying star, it was crafted for the Asgardian royal family. The hammer’s enchantments, added by Odin, make it nearly indestructible and grant it the power to summon the weather. Its most famous enchantment is that only one “worthy” of wielding it can lift it, a testament to Thor’s character and destiny.

In Marvel lore, Mjolnir’s mythological significance is preserved, symbolizing Thor’s identity and power. The hammer’s ability to determine worthiness becomes a central theme in Thor’s journey, especially in the Infinity Saga. Its origins and magical properties make it one of the most iconic weapons in both mythology and modern storytelling.

Mjolnir in the Marvel Cinematic Universe

Mjolnir, Thor’s legendary hammer, holds a central role in the Marvel Cinematic Universe (MCU), embodying Thor’s identity and power. Forged by the Dwarves of Nidavellir, it is nearly indestructible and wields the power of the storm. The hammer’s enchantment, requiring the user to be “worthy,” becomes a recurring theme in Thor’s journey, symbolizing his growth and self-discovery.

In the MCU, Mjolnir is first introduced in Thor (2011) as a symbol of Thor’s heritage and might. Its destruction by Hela in Thor: Ragnarok (2017) marks a turning point, leading to the creation of Stormbreaker. The hammer’s legacy continues in Avengers: Endgame (2019), where a younger version of Thor brings it into the present, showcasing its enduring significance. The humor and emotional weight tied to Mjolnir make it an iconic and beloved element of the MCU.

Mjolnir’s journey in the MCU highlights its cultural and symbolic importance, transcending its role as a weapon to represent honor, sacrifice, and redemption.

LEGO Set 76209: Thor’s Hammer Overview

LEGO Set 76209 recreates Thor’s iconic hammer, Mjolnir, with 979 pieces. It includes a display stand, Thor minifigure, and Odin’s treasure. The set features intricate details and a hidden line effect for authenticity, perfect for Marvel fans and collectors.

Key Features of the LEGO Thor’s Hammer Set

The LEGO Thor’s Hammer set (76209) is a meticulously designed Marvel Super Heroes model featuring 979 pieces. It includes a detailed replica of Mjolnir, a display stand, and a Thor minifigure. The set also comes with Odin’s treasure display, complete with miniature Infinity Gauntlet and Tesseract. The hammer’s head is crafted with intricate details, and the handle incorporates a hidden line effect using thin, aviation-grade wire for a realistic look. The packaging is sleek, resembling a prop replica box, with images of the set and its features. The set is designed for both play and display, appealing to Marvel fans and LEGO enthusiasts alike. Additional accessories include a plaque with the Infinity Saga logo, enhancing the overall presentation. The set’s complexity and attention to detail make it a standout piece in any LEGO collection, perfect for those who appreciate Marvel’s iconic weaponry and LEGO’s craftsmanship.

Packaging and Box Design

The LEGO Thor’s Hammer set (76209) comes in a sleek, premium packaging that resembles a prop replica. The front of the box features the LEGO logo and a striking blue stripe, giving it a polished appearance. On the back, the hammer is depicted upright, showcasing its power and detail. The packaging includes inset images highlighting the set’s dimensions, a photo of the movie prop, and visuals of the included Thor minifigure and Odin’s treasure display. Inside, the contents are neatly organized, with the instruction booklet and polybagged components ensuring everything is protected and easy to access. The packaging design emphasizes the set’s collector’s appeal, making it a standout on store shelves. Additionally, the box’s artwork and layout are designed to evoke the grandeur of Thor’s iconic weapon, Mjolnir, further enhancing the unboxing experience for fans and collectors alike.

Minifigures and Accessories Included

The LEGO Thor’s Hammer set (76209) includes a selection of minifigures and accessories that add to its appeal. The primary minifigure is Thor, depicted in his iconic Marvel Cinematic Universe outfit. Additionally, the set features a display of Odin’s treasure, which includes miniaturized versions of key Marvel artifacts such as the Infinity Gauntlet, the Tesseract, and the Eternal Flame. These accessories are intricately designed to resemble their on-screen counterparts, enhancing the overall authenticity of the set. The inclusion of these minifigures and accessories allows fans to recreate scenes from Marvel movies or display them alongside the hammer, Mjolnir. The attention to detail in both the minifigures and accessories ensures that this set is not only a building experience but also a collectible item for Marvel enthusiasts. The combination of Thor and the treasure display makes this set a must-have for fans looking to expand their LEGO Marvel collection.

Special Elements and Hidden Details

The LEGO Thor’s Hammer set (76209) boasts several special elements and hidden details that make it a standout piece. One of the most notable features is the use of aviation-grade, extremely thin wire to achieve a hidden line effect, adding a subtle yet impressive visual detail to the hammer’s design. The set also includes a sturdy stand that allows the hammer to be displayed upright, emphasizing its power and grandeur. Additionally, the set incorporates intricate greebling elements, such as the blue stripe across the bottom of the packaging, which mimics the aesthetic of a high-end prop replica. Hidden details like the tiny engravings and the textured surface of the hammerhead further enhance its authenticity. The set also includes a plaque with the iconic phrase “Whosoever holds this hammer, if he be worthy, shall possess the power of Thor,” adding a touch of lore to the display. These special elements and hidden details make the LEGO Thor’s Hammer a visually stunning and deeply immersive build for fans of the Marvel Cinematic Universe.

Building Instructions for LEGO Thor’s Hammer

The LEGO Thor’s Hammer instructions offer a comprehensive guide with detailed steps and visual aids. The 120-page booklet ensures a smooth assembly process, while tips for mastering the hidden line effect enhance the build experience.

Preparing for the Build

Before starting your LEGO Thor’s Hammer build, ensure all components are organized. Carefully unpack the 979 pieces, paying attention to unique elements like the hammer head, handle, and display stand. Sort pieces by type and color for efficiency.

Review the 120-page instruction booklet to familiarize yourself with the assembly process. Note the use of aviation-grade thin wire for the hidden line effect, ensuring proper handling to avoid damage. Gather a flat, stable workspace and good lighting for clarity.

Prepare your tools, such as a brick separator, to ease part removal from polybags. Double-check for all minifigures, including Thor and Odin’s treasure display, and ensure no pieces are missing. Plan your build sequence to align complex elements like the hammer’s head and handle accurately.

Finally, mentally prepare for the intricate details, such as the hidden wire integration, to achieve the desired aesthetic. With patience and organization, you’ll be ready to craft this iconic Marvel artifact faithfully.

Step-by-Step Building Process

The LEGO Thor’s Hammer (76209) building process begins with constructing the base of the hammer. Start by assembling the handle, ensuring proper alignment of the intricate details. Next, attach the hammer head, carefully integrating the aviation-grade wire to achieve the hidden line effect for a seamless look.

Proceed by adding the display stand, which features the Mjölnir nameplate and Infinity Saga logo. Secure the hammer to the stand using the provided instructions. Finally, assemble the included minifigures, such as Thor, and place them alongside the hammer for a complete display. Follow the 120-page guide meticulously to ensure all elements are accurately positioned and connected. This step-by-step approach guarantees a precise and visually stunning final product, perfect for showcasing your Marvel fandom. The build requires patience and attention to detail, but the result is a magnificent replica of Thor’s iconic weapon.

Tips for Mastering the Hidden Line Effect

To achieve the impressive hidden line effect in the LEGO Thor’s Hammer set, start by carefully handling the aviation-grade thin wire provided. This wire is durable under tension and pressure but can be brittle, so avoid bending it excessively. Use gloves to prevent oils from your skin damaging the wire. Begin by threading the wire through the pre-drilled holes in the hammer head, following the instructions precisely to ensure proper alignment. Tighten the wire gradually, checking its tautness as you go. Use a LEGO tool or flathead screwdriver to secure the wire ends firmly without over-tightening, which could cause breakage. To enhance the effect, bend the wire gently to create a subtle curve, mimicking the energy lines seen in the Marvel Cinematic Universe. Practice on a smaller scale first if unsure, and ensure the wire is evenly distributed for a seamless look. With patience and careful handling, the hidden line effect will add an extraordinary detail to your Thor’s Hammer build.

Troubleshooting Common Building Issues

When building the LEGO Thor’s Hammer set, several common issues may arise. One frequent problem is misalignment of the hidden wire, which can cause the energy lines to appear uneven. To resolve this, carefully rethread the wire through the designated holes, ensuring it follows the instruction guide precisely; Another issue is the wire breaking due to excessive bending or tension. If this happens, replace the damaged wire with a new one, as provided in the set or sourced separately. Additionally, some builders may find the stand unstable, leading to the hammer toppling over. To fix this, double-check that all bricks in the stand are securely connected and that the hammer is properly balanced. If pieces do not fit together as expected, verify that they are oriented correctly and that no extra bricks are left behind. For further assistance, consult the LEGO customer support team or refer to online forums for community solutions. Patience and attention to detail are key to overcoming these challenges and achieving a flawless build.

tv guide san luis obispo

A TV guide provides viewers in San Luis Obispo with a comprehensive overview of channel listings, helping them navigate through an extensive range of entertainment options, from local broadcasts to popular network programming.

Accessing the TV Guide

Residents in San Luis Obispo can access TV listings through traditional methods like newspapers or digital platforms, including cable provider websites, mobile apps, and online entertainment guides for convenience.

Traditional Methods

Traditional methods for accessing the TV guide in San Luis Obispo include print media, such as newspapers and magazines, which often publish daily or weekly listings. Many local newspapers dedicate a section to TV schedules, making it easy for viewers to plan their watching. Additionally, some cable providers still distribute printed TV guides as part of their service, offering a tangible resource for users to flip through. Another traditional approach is tuning into the TV itself, as many channels display an

Digital Platforms

In San Luis Obispo, digital platforms have revolutionized how viewers access TV guides, offering unparalleled convenience and customization. Online TV guides provide real-time updates, allowing users to search for specific shows, filter by genre, and even set reminders. Many cable and satellite providers offer dedicated websites and apps, such as Xfinity or Spectrum, where users can browse listings and plan their viewing schedule. Additionally, third-party apps like TV Guide or On TV Tonight cater to multiple providers, giving viewers a one-stop solution for all their channel listings. These platforms often include features like personalized watchlists and recommendations based on viewing habits. With the rise of streaming services, digital TV guides have also incorporated options to search across both traditional channels and online platforms, making it easier than ever to find and enjoy content.

Popular TV Channels in San Luis Obispo

San Luis Obispo offers a variety of popular TV channels, including major networks like ABC, CBS, and NBC, as well as local stations providing news, entertainment, and sports programming.

Major Networks

Major networks like ABC, CBS, NBC, and FOX dominate the TV guide in San Luis Obispo, offering a wide array of popular programming. These networks provide a mix of news, dramas, comedies, and reality TV, catering to diverse viewer preferences. They also feature live sports and special events, making them a staple for many households. With their extensive reach and high-quality content, major networks remain a primary choice for entertainment and information. Viewers can easily find their favorite shows and plan their viewing schedules using the TV guide, ensuring they never miss out on prime-time hits or breaking news. The availability of these networks in San Luis Obispo underscores the region’s access to both national and regional content, providing a balanced viewing experience.

Local Stations

Local stations in San Luis Obispo provide a unique perspective on community-focused programming, ensuring viewers stay informed about regional news, weather, and events. These stations often air content tailored to the Central Coast, including local sports, community events, and public affairs. They serve as a vital source of information for residents, offering insights into issues specific to the area. Many local stations also broadcast high school sports, city council meetings, and cultural events, fostering a strong sense of community. Additionally, they often partner with local organizations to create engaging content that highlights the region’s heritage and lifestyle. For viewers seeking a more personalized connection to their area, local stations are an invaluable resource, offering a blend of entertainment and information that resonates deeply with San Luis Obispo’s diverse population.

Programming Highlights

San Luis Obispo’s TV guide offers a diverse range of programming, including popular shows, movies, and local content, helping viewers discover new favorites and plan their viewing schedules effectively.

Prime Time Shows

Prime time shows are a staple of evening entertainment in San Luis Obispo, offering viewers a wide array of captivating dramas, comedies, and reality TV series. These shows typically air between 7:00 PM and 10:00 PM, attracting the largest audiences. With a diverse range of networks available, residents can enjoy popular series like Grey’s Anatomy, The Voice, and FBI, ensuring there’s something for everyone. The TV guide helps viewers stay updated on the latest episodes, finales, and special events, making it easier to plan their evenings. Additionally, local stations often feature exclusive content, blending national favorites with community-focused programming. This mix of entertainment options ensures that prime time remains a highlight for television enthusiasts in the area, providing endless choices to suit all tastes and preferences.

Sports and Live Events

Sports and live events are a thrilling part of the TV guide in San Luis Obispo, offering fans a chance to catch their favorite teams and athletes in action. Whether it’s a high-stakes NBA game, an MLB playoff, or a Premier League soccer match, viewers can rely on the guide to find out when and where to watch. Additionally, live events such as concerts, award shows, and political debates are prominently featured, ensuring audiences never miss a moment. Channels like ESPN, Fox Sports, and NBC Sports provide extensive coverage, while local stations highlight regional sports teams. The TV guide also includes start times, channel numbers, and event details, making it easy for residents to plan their viewing schedules. This section is a must-check for sports enthusiasts and anyone who enjoys the excitement of live programming.

Movies and Series

Movies and series are a cornerstone of entertainment in San Luis Obispo, with the TV guide offering a diverse selection of options to suit every viewer’s taste. From blockbuster films to critically acclaimed series, the guide provides detailed listings of what’s airing on popular networks like HBO, Netflix, and ABC. Whether you’re a fan of action-packed adventures, romantic comedies, or gripping dramas, the TV guide ensures you never miss your favorite shows. It also highlights premiere dates, episode summaries, and channel information, making it easier to plan your viewing schedule. Additionally, the guide often features special programming, such as marathons of popular series or exclusive movie events. With so many choices available, the TV guide is an essential tool for staying up-to-date on the latest movies and series in San Luis Obispo.

How to Choose the Right Channel Package

Selecting the right channel package in San Luis Obispo involves evaluating your viewing preferences and budget. Start by identifying the channels and genres you prioritize, such as sports, movies, or local programming. Consider the number of household members and their preferences to ensure the package caters to everyone. Next, compare the available packages from providers like Spectrum, AT&T, or Dish Network, focusing on channel lineups, pricing, and any additional features like DVR or streaming options. Check for promotions or bundle deals that could reduce costs. Finally, review the contract terms, including any installation fees or cancellation policies, to ensure the package aligns with your long-term needs. By weighing these factors, you can choose a package that offers the best value and entertainment experience for your household.

Tips for Using the TV Guide Effectively

To maximize your TV viewing experience in San Luis Obispo, use the TV guide strategically. Start by filtering channel listings by genre, such as sports, movies, or news, to quickly find what interests you. Set reminders for upcoming shows or events to avoid missing your favorites. Utilize the search function to locate specific programs or actors, saving time scrolling through numerous channels. Customize your view by selecting only subscribed channels to avoid clutter. Check ratings and descriptions to make informed decisions about what to watch. For planning ahead, use the guide’s schedule feature to plan your week’s viewing. Finally, explore additional features like DVR options or on-demand listings to enhance your experience. By using these tips, you can efficiently navigate the TV guide and enjoy a personalized entertainment experience tailored to your preferences.

Frequently Asked Questions

How do I access the TV guide for San Luis Obispo? You can access it through traditional methods like print listings or digital platforms such as provider apps and websites. Some cable providers also offer interactive guides on their platforms.

What are the most popular TV channels in San Luis Obispo? Major networks like ABC, CBS, and NBC are widely viewed, along with local stations that offer community-focused programming.

Can I filter the TV guide by genre or specific programs? Yes, many digital platforms allow users to search for sports, movies, or series, making it easier to find favorite shows.

How do I choose the right channel package? Consider your viewing habits and budget to select a package that includes your preferred channels and genres.

Are there options for streaming or online viewing guides? Yes, most providers offer online guides, and streaming platforms like Hulu or YouTube TV provide similar features.

How often is the TV guide updated? Guides are typically updated daily to reflect schedule changes and new programming.

Can I set reminders for upcoming shows? Many digital platforms allow users to set reminders or schedule recordings for their favorite programs.

Are there options for accessibility features? Yes, many guides offer closed captions, audio descriptions, and other accessibility features for viewers with disabilities.

How do I find out about new or special events? Check the guide’s highlights section or subscribe to notifications for updates on special programming.

emergency medical responder study guide

The Emergency Medical Responder (EMR) is the first point of contact in medical emergencies, providing immediate care and stabilization. They are trained in basic life support, patient assessment, and life-saving interventions, bridging the gap between the scene and advanced medical services.

1.1 Overview of the EMR Certification

The EMR certification is an entry-level credential administered by the National Registry of Emergency Medical Technicians (NREMT). It validates the ability to provide basic emergency care, including patient assessment, trauma management, and life-saving interventions. The certification requires passing a cognitive exam with 90-110 questions, focusing on airway management, cardiology, and legal principles. It is essential for responders in emergency medical services (EMS).

1.2 Key Responsibilities of an Emergency Medical Responder

Emergency Medical Responders (EMRs) provide initial patient care and stabilization. Their key duties include assessing patients, managing airways, controlling bleeding, and using automated external defibrillators (AEDs). They also provide basic life support, document patient conditions, and ensure scene safety. EMRs act as a crucial link between the emergency and advanced medical care, ensuring timely and effective interventions to improve patient outcomes in critical situations.

Understanding the NREMT EMR Exam

The NREMT EMR exam consists of 90-110 questions, requiring 1 hour and 45 minutes to complete. It costs $85 and covers airway management, trauma, cardiology, and patient assessment.

2.1 Exam Format and Question Types

The NREMT EMR exam includes 90-110 multiple-choice questions with four answer options. The format tests cognitive knowledge in areas like airway management, trauma, and cardiology. Questions are scenario-based, requiring critical thinking and application of skills. The exam is timed at 1 hour and 45 minutes and costs $85. It assesses the ability to provide basic life support and stabilization in emergency situations effectively.

2.2 Time Management and Exam Duration

The NREMT EMR exam lasts 1 hour and 45 minutes, containing 90-110 questions. Effective time management is crucial to ensure all questions are addressed. Allocate approximately 1-2 minutes per question, allowing time for review. Prioritize high-confidence answers first, then revisit challenging ones. Practice with timed mock exams helps build speed and accuracy, enhancing overall performance during the actual test.

Essential Medical Knowledge for EMR

EMRs must master airway management, ventilation, and oxygenation techniques, as well as patient assessment and vital sign interpretation. Understanding trauma care, medical emergencies, and cardiology is critical for effective response.

3.1 Airway, Ventilation, and Oxygenation Techniques

EMRs must ensure a patent airway, utilizing techniques like the head-tilt chin-lift. Ventilation support includes bag-valve-mask devices and oxygen administration. Proper oxygenation is vital, with pulse oximetry monitoring. These skills are critical for maintaining adequate oxygenation and preventing hypoxia in emergency situations. Understanding these techniques is essential for patient stabilization and preparation for transport to higher-level care.

3.2 Patient Assessment and Vital Signs

EMRs perform patient assessments to identify chief complaints and medical history. Vital signs, such as pulse, breathing rate, blood pressure, and oxygen saturation, are critical for determining patient condition. Techniques like the head-tilt chin-lift and bag-valve-mask devices support airway management. Legal and ethical considerations, including patient consent, guide EMRs in providing care while maintaining confidentiality and professionalism. These skills ensure accurate triage and appropriate intervention.

Trauma and Injury Management

Trauma and injury management focuses on assessing and stabilizing patients with injuries. EMRs learn hemorrhage control techniques, such as tourniquet application and wound management. Proper cleaning and dressing of wounds prevent infection, ensuring optimal patient outcomes and survival.

4.1 Assessment and Stabilization of Trauma Patients

Assessing trauma patients involves following the ABCDE approach: Airway, Breathing, Circulation, Disability, and Exposure. Control bleeding with tourniquets or hemostatic agents. Stabilize fractures with splints and manage spinal injuries with backboards. Monitor vital signs like blood pressure and respiratory rate. Ensure scene safety and logroll patients for injury assessment while maintaining spinal alignment. Prioritize transport to a trauma center based on patient condition.

4.2 Bleeding Control and Wound Management

Control severe bleeding using tourniquets, hemostatic agents, or direct pressure. Assess wounds for depth, size, and contamination. Clean and dress wounds to prevent infection. Apply splints to injuries near fractures. Monitor for shock signs, such as pale skin or rapid heartbeat. Transport patients to higher-level care if wounds are critical or bleeding cannot be controlled. Always prioritize patient safety and use personal protective equipment.

Medical Emergencies and Cardiology

Recognize and manage cardiac arrest, understand AED use, and provide immediate care for heart-related emergencies. Quick, accurate interventions are crucial for improving patient outcomes in these situations.

5.1 Recognizing and Managing Cardiac Arrest

Cardiac arrest occurs when the heart stops beating, requiring immediate intervention. EMRs must quickly recognize unresponsiveness, absence of breathing, or abnormal breathing (agonal breathing). Initiate CPR with a compression-to-ventilation ratio of 30:2 for adults. Use an AED as soon as available, following voice prompts. Administer epinephrine if trained and authorized. Continuous, high-quality chest compressions are critical to maintain blood circulation.

5.2 Understanding and Using Automated External Defibrillators (AEDs)

An Automated External Defibrillator (AED) is a lifesaving device used to restore a normal heart rhythm during cardiac arrest. EMRs should turn it on, follow voice prompts, and apply pads to the patient’s bare chest. The AED analyzes the heart rhythm and delivers a shock if needed. After each shock, resume CPR immediately, continuing until advanced medical help arrives or the patient regains consciousness.

Legal and Ethical Considerations

EMRs must adhere to legal standards, including patient consent and confidentiality, ensuring ethical care. Understanding these principles is crucial for building trust and avoiding liability in emergencies.

6.1 Patient Consent and Confidentiality

Patient consent ensures EMRs provide care with the individual’s agreement, respecting autonomy. Confidentiality protects personal health information from unauthorized disclosure. Both principles uphold ethical standards and legal requirements, fostering trust between responders and patients. Breaches can lead to legal consequences, emphasizing the importance of adherence in all emergency situations.

6.2 Scene Safety and Responder Wellness

Ensuring scene safety is critical to protect both patients and responders from potential hazards. EMRs must assess environments for risks like traffic or environmental dangers; Responder wellness focuses on physical and mental health, including stress management and self-care, to maintain effectiveness in emergency situations. Prioritizing safety and wellness ensures responders can provide optimal care while safeguarding their own health and well-being.

Study Materials and Resources

Key resources include recommended textbooks, online platforms like Quizlet, and interactive tools such as flashcards and practice exams to aid comprehensive preparation for the EMR certification.

7.1 Recommended Textbooks and Online Platforms

Essential study materials include textbooks like Emergency Care and Response and EMT Prefinal Exam Prep. Online platforms such as Quizlet offer flashcards for terms like “emergency medical responder roles.” Interactive tools like practice exams on Pearson Vue and free EMR questions provide hands-on preparation. These resources cover key topics, ensuring a comprehensive understanding of EMR skills and exam readiness.

7.2 Flashcards and Interactive Study Tools

Flashcards are a key resource for memorizing terms and concepts, such as those found on Quizlet. Interactive tools like digital flashcards and practice exams on platforms like Pearson Vue enhance retention. Many study guides also include interactive simulations, allowing learners to practice real-world scenarios. These tools provide an engaging way to reinforce knowledge and prepare for the EMR exam effectively.

Practice Tests and Exam Preparation

Practice tests are essential for exam readiness, helping candidates familiarize themselves with the format and content. They cover key areas like patient assessment and trauma care, improving time management and confidence. Utilizing online platforms and study guides ensures comprehensive preparation for the NREMT EMR exam.

8.1 Benefits of Taking Practice Exams

Taking practice exams offers numerous benefits, including improved familiarity with the test format and question types. It enhances time management skills, reducing exam-day anxiety. Practice exams also highlight areas needing review, allowing focused study. Additionally, they boost confidence by simulating real-world scenarios, ensuring readiness for the actual NREMT EMR certification exam.

8.2 Analyzing Common Exam Questions and Answers

Analyzing common exam questions helps identify recurring themes and high-focus areas. Reviewing correct and incorrect answers clarifies misconceptions and strengthens understanding. This process reveals question patterns, such as trauma, cardiology, and patient assessment topics. It also highlights the reasoning behind answers, improving critical thinking and decision-making skills essential for success on the NREMT EMR exam.

Final Exam Strategies

Effective time management and prioritizing high-probability questions are crucial. Stay calm, read carefully, and use the process of elimination for difficult questions. Manage your time wisely to ensure all questions are addressed within the allotted 105 minutes, maximizing your score potential while maintaining composure throughout the exam.

9.1 Time Management During the Exam

Allocate 1-1.2 minutes per question to stay within the 105-minute limit. Skip difficult questions initially, marking them for later review. Practice time management during study sessions to build speed and accuracy. Read each question carefully, ensuring understanding before answering. If time permits, review all answers, especially those skipped or guessed. Stay calm and focused to maintain composure throughout the exam.

9.2 Approaching Difficult Questions Effectively

When faced with challenging questions, read them carefully and identify key terms. Eliminate obviously incorrect answers first. Use the process of elimination to narrow down choices. If unsure, make an educated guess based on prior knowledge. Avoid changing answers unless certain. Skip and return to difficult questions after completing easier ones. Review skipped questions thoroughly before submitting the exam.

Post-Exam Actions and Certification Maintenance

After passing the exam, maintain certification through continuing education and adhering to NREMT renewal requirements. Understand exam results and retake policies if necessary to ensure certification stays active.

10.1 Understanding Exam Results and Retake Policies

After taking the NREMT EMR exam, results are categorized as pass or fail. If unsuccessful, candidates can retake the exam after a 15-day waiting period. The NREMT allows up to six retake attempts within two years. Understanding the retake policy and focusing on weak areas using study guides and practice tests is crucial for success. Utilize free resources like Quizlet and exam prep materials to improve performance.

10.2 Continuing Education Requirements for EMR Certification

Continuing education is essential to maintain NREMT EMR certification. Professionals must complete refresher courses and continuing education hours every two years. Topics include patient assessment, trauma care, and medical emergencies. Staying updated ensures responders provide current, evidence-based care.

Utilize online platforms, study guides, and practice tests to fulfill requirements. Regular training reinforces skills and prepares for real-world scenarios, ensuring competency and certification renewal.

Real-World Application of EMR Skills

EMR skills are applied in real emergencies, using case studies and practical training to prepare for life-threatening situations. This builds confidence in high-pressure scenarios.

11.1 Case Studies and Practical Scenarios

Case studies and practical scenarios simulate real-life emergencies, enabling EMRs to apply knowledge in realistic contexts. These tools enhance decision-making skills, teaching EMRs to assess patients, prioritize care, and manage resources effectively. By practicing scenarios like cardiac arrest, trauma, or medical emergencies, EMRs gain confidence and proficiency in delivering timely and appropriate care. This hands-on approach ensures readiness for diverse and unpredictable situations.

11.2 Building Confidence in Emergency Situations

Building confidence in emergency situations is crucial for EMRs to perform effectively. Through hands-on training, simulations, and real-world exposure, EMRs develop the skills and assurance needed to remain calm under pressure. Regular practice and positive feedback enhance decision-making and the ability to act swiftly. Confidence grows as EMRs master protocols and gain experience, enabling them to provide reliable care in high-stress environments.

Success as an EMR requires dedication, continuous learning, and practice. Stay focused, utilize study resources, and remain confident to excel in real-world emergencies and exams.

12.1 Staying Motivated and Focused During Study

Staying motivated requires setting clear goals, tracking progress, and celebrating milestones. Use interactive tools like flashcards and practice tests to keep study engaging. Join study groups to enhance understanding and stay accountable. Prioritize mental well-being by taking breaks and maintaining a balanced routine. Positive reinforcement and a growth mindset are key to remaining focused and driven throughout your EMR preparation journey.

12.2 Leveraging Peer Support and Study Groups

Peer support and study groups are invaluable for EMR preparation. Collaborating with others fosters a shared learning environment, allowing discussion of complex topics and real-world scenarios. Study groups help identify knowledge gaps, while collective problem-solving enhances understanding. Sharing resources, such as flashcards and practice tests, can streamline study efforts. This camaraderie not only reduces stress but also builds confidence, ensuring a well-rounded approach to exam success.