makeup for pictures tutorial

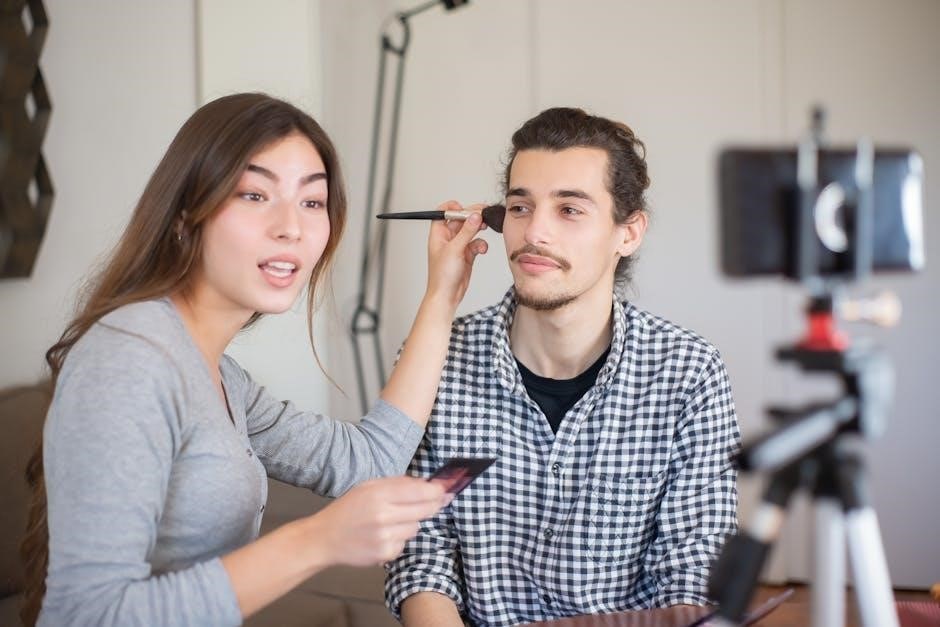
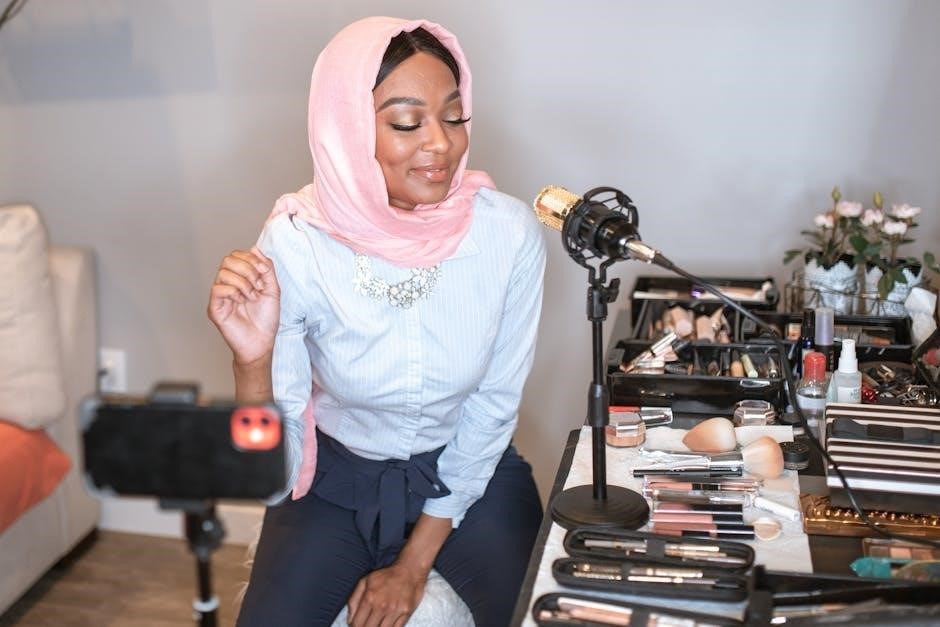
Navigating the world of makeup for photoshoots can feel daunting, but it doesn’t have to be! This tutorial, created with expert guidance, will empower you to achieve a flawless, camera-ready look.

Professional lights and cameras significantly impact how makeup appears, often washing out color. Understanding these nuances is key to ensuring your best self translates beautifully in every shot.

We’ll explore techniques to enhance your features, correct imperfections, and create a lasting impression, ensuring you feel confident and radiant in front of the lens.

Why Makeup Looks Different in Photos

The camera doesn’t see makeup the same way the human eye does. This is a fundamental concept in understanding makeup for pictures. Studio lighting, and even the flash on your phone, dramatically alters how colors and textures appear on camera.

Specifically, bright lights tend to flatten features and wash out color intensity. What looks like a subtle blush in person can disappear entirely in a photograph. Similarly, a natural lip color might register as almost nonexistent. This is because the camera captures light reflecting off your face, and strong light sources can overwhelm delicate makeup applications.

Furthermore, the camera exaggerates certain textures and imperfections. Pores, fine lines, and uneven skin tone become more prominent. Therefore, a heavier hand with foundation and concealer is often necessary to create a smooth, even base. It’s crucial to remember that makeup for photos isn’t about looking “natural” in person; it’s about looking fantastic on camera.

Essentially, you need to amplify your makeup application to compensate for the camera’s effects, ensuring your features are defined and your color choices are vibrant.

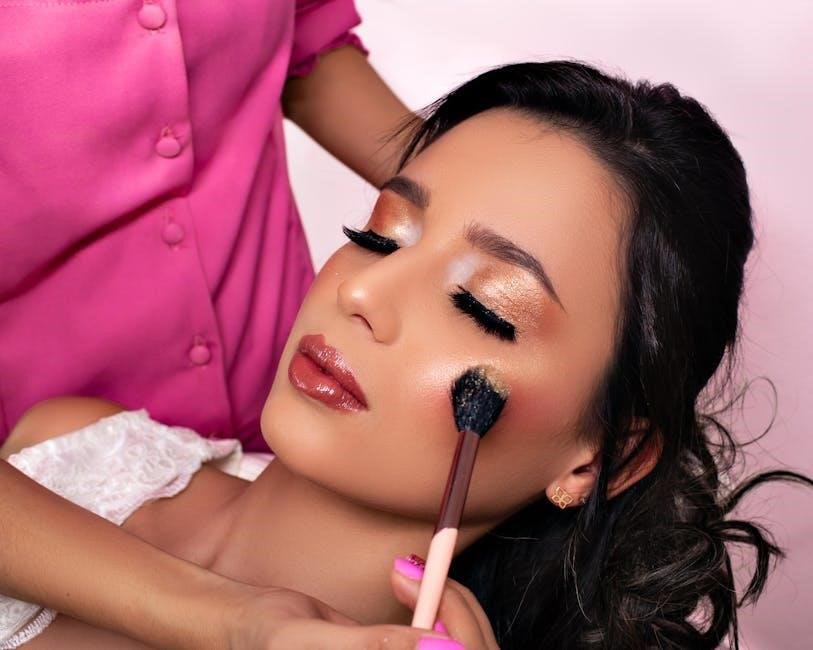
The Importance of Camera-Ready Makeup

Investing time in camera-ready makeup is paramount for achieving stunning photographs. It’s not merely about concealing flaws; it’s about enhancing your features and creating a polished, confident appearance that translates beautifully on film or in digital images.

Proper makeup ensures you recognize yourself in the final photos, and that your personality shines through. Without adequate makeup, you risk looking washed out, flat, or even older than you are. A well-executed makeup application defines your bone structure, brightens your complexion, and draws attention to your best features.

Consider professional portrait sessions – makeup is a crucial step, often requiring more intensity than everyday wear. Even for casual photos, a little extra effort can make a significant difference. It’s about understanding how light interacts with makeup and adjusting your application accordingly.

Ultimately, camera-ready makeup is an investment in preserving cherished memories, ensuring you look and feel your absolute best in every photograph.

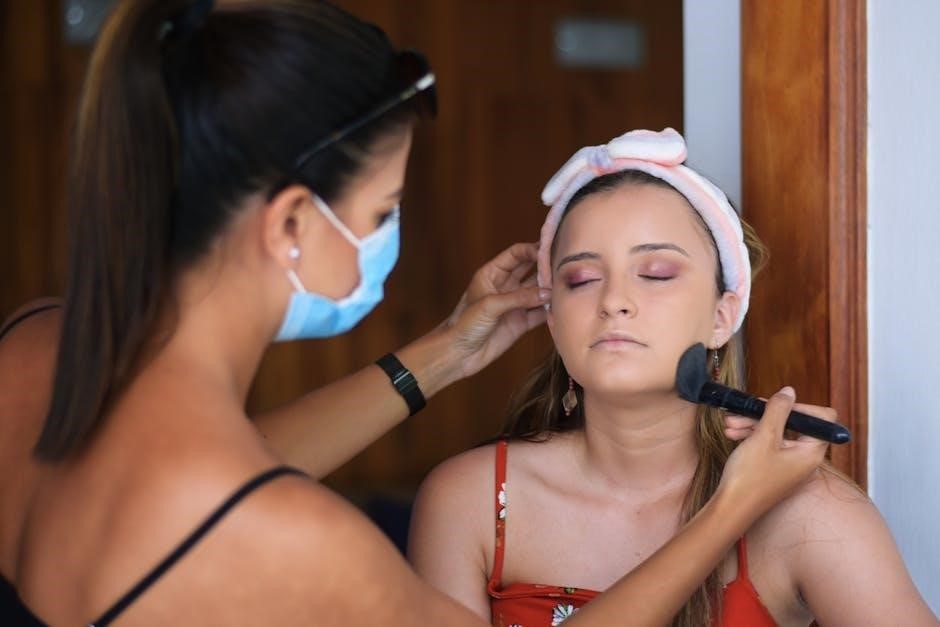
Skin Preparation: The Foundation for Success

Flawless makeup begins with a well-prepared canvas! Proper skin prep ensures smooth application, longevity, and a natural finish, maximizing the impact of your makeup artistry.

Primer: Creating a Smooth Canvas

Primer is often an overlooked step, but it’s absolutely crucial for camera-ready makeup. Think of it as the base layer that sets everything up for success, smoothing the skin’s texture and creating an even surface for foundation application.

A good primer can effectively minimize the appearance of pores, fine lines, and imperfections, resulting in a more polished look on camera. It also helps to control oil production, preventing shine and ensuring your makeup stays put throughout the photoshoot.

Primer doesn’t just smooth; it also helps makeup adhere better, avoiding patchy or clumpy application. There are various types of primers available, catering to different skin concerns – from hydrating primers for dry skin to mattifying primers for oily skin.

Choosing the right primer depends on your skin type and desired finish. If you’re unsure where to start, resources like Refinery 29 offer helpful guides to navigate the world of primers and find the perfect match for your needs;

Color Correction: Addressing Imperfections

Before applying foundation, color correction is a powerful technique to neutralize skin discolorations and create a flawless base. Cameras can exaggerate imperfections, making color correction even more vital for achieving a polished look in photos.

Different colored correctors address specific concerns: green neutralizes redness (like acne or rosacea), peach or orange cancels out blue undertones (often found in under-eye circles), and lavender brightens dullness and corrects sallowness.

Apply color corrector sparingly, focusing only on the areas that need it. Blend it seamlessly into the skin before moving on to foundation. Remember, a little goes a long way! The goal isn’t to completely eliminate the discoloration, but to neutralize it so foundation can create an even tone.

Choosing the right shade of corrector is key. Fair skin tones typically benefit from peach correctors, while medium to deep skin tones may require orange or red-toned correctors. Mastering this step ensures a naturally balanced and radiant complexion on camera.

Foundation: Choosing the Right Formula & Coverage

Selecting the right foundation is crucial for a camera-ready complexion. Remember, professional lighting tends to wash out makeup, so opting for slightly more coverage than your everyday routine is advisable. However, avoid anything too heavy, as it can appear cakey on camera.

Consider your skin type when choosing a formula. Oily skin benefits from matte, long-wearing foundations, while dry skin thrives with hydrating, dewy options. For normal skin, a satin finish offers a balanced look.

Full coverage foundations are excellent for concealing imperfections, but can be blended with a lighter formula for a more natural effect. Medium coverage provides sufficient coverage without looking heavy. Always match the foundation to your jawline in natural light to ensure a seamless blend.

Don’t forget to blend thoroughly with a brush, sponge, or your fingers, extending the foundation down your neck to avoid harsh lines. A well-applied foundation creates a smooth, even canvas for the rest of your makeup.

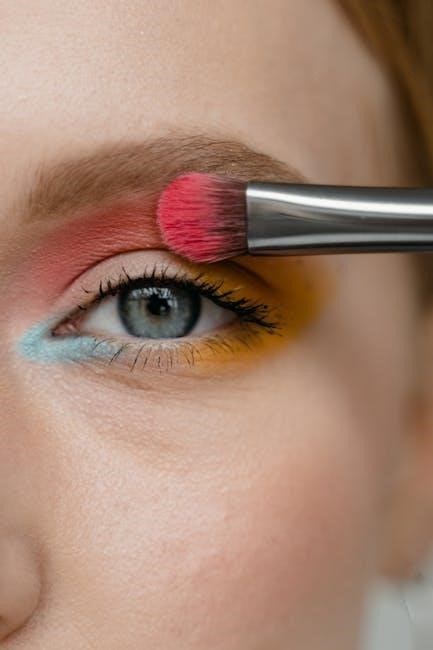
Enhancing Features for the Camera

Now, let’s sculpt and define! Contouring, highlighting, and blush are essential for adding dimension and warmth, ensuring your features pop beautifully in photographs.

These techniques compensate for the flattening effect of the camera, creating a more sculpted and vibrant appearance.

Contouring: Defining Your Face Shape

Contouring is your secret weapon for adding definition and structure to your face, especially crucial when the camera tends to flatten features. It’s about creating shadows to sculpt and enhance your natural bone structure. Begin by identifying your face shape – round, oval, square, or heart-shaped – as this will dictate where you apply the contour.

Use a cool-toned contour powder or cream that’s two to three shades darker than your skin tone. Apply it along the hollows of your cheeks (suck in your cheeks to find them!), along your temples, and along your jawline. Blend, blend, blend! Harsh lines are a no-no; the goal is a seamless, natural shadow. Remember, professional lights can wash out contour, so don’t be afraid to build up the intensity gradually.

For a softer look, use a fluffy brush. If you have a rounder face, focus on contouring under the cheekbones to create more definition. For a square face, soften the jawline with contour. Don’t forget to blend downwards to avoid creating a muddy appearance. A well-contoured face will appear more defined and sculpted in photos, enhancing your overall look.

Highlighting: Adding Dimension and Glow

Highlighting works in tandem with contouring, bringing light to the high points of your face and creating a beautiful, dimensional effect. This is especially important for photos, as cameras can sometimes flatten features. Choose a highlighter that complements your skin tone – champagne shades work well for fair skin, while gold or bronze tones suit warmer complexions.

Apply highlighter to the tops of your cheekbones, down the bridge of your nose, on your cupid’s bow, and under your brow bone. A subtle shimmer on the inner corners of your eyes can also brighten your gaze. Use a light hand; you want a glow, not a blinding shine. Remember that professional lighting can amplify highlighter, so start with a small amount and build up as needed.

For a natural look, opt for a cream or liquid highlighter blended seamlessly into your foundation. Powder highlighters are great for setting your makeup and adding a more intense glow. Highlighting strategically draws attention to your best features and creates a radiant, youthful appearance in photographs.

Blush: Adding Color and Warmth (More Than Usual!)

Cameras tend to wash out color, so don’t be shy with your blush! You’ll need significantly more blush for photos than you would for everyday wear – professional studio lights can diminish your natural flush by at least 50%. This doesn’t mean going overboard, but rather strategically applying a more vibrant shade to counteract the flattening effect of the camera.

Choose a blush color that complements your skin tone and consider the overall look you’re aiming for. Peach and pink tones are universally flattering, while coral shades add warmth. Apply blush to the apples of your cheeks, blending upwards towards your temples. Smile while applying to ensure the color is placed correctly.

Powder blush is a classic choice, but cream blushes can provide a more natural, dewy finish. Remember to blend well to avoid harsh lines. Adding extra color to your cheeks will ensure you look healthy and vibrant in your photos, preventing a washed-out appearance.

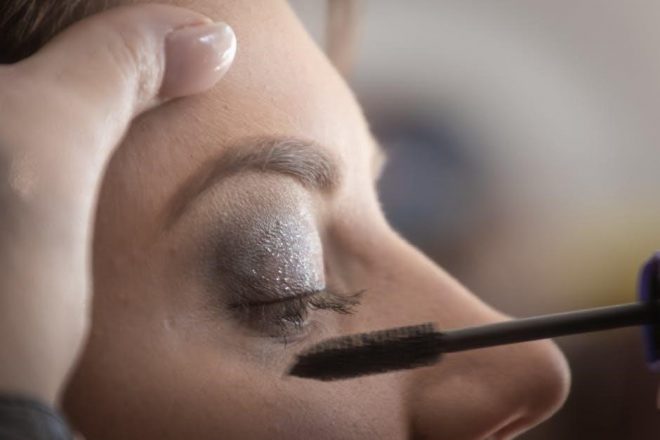
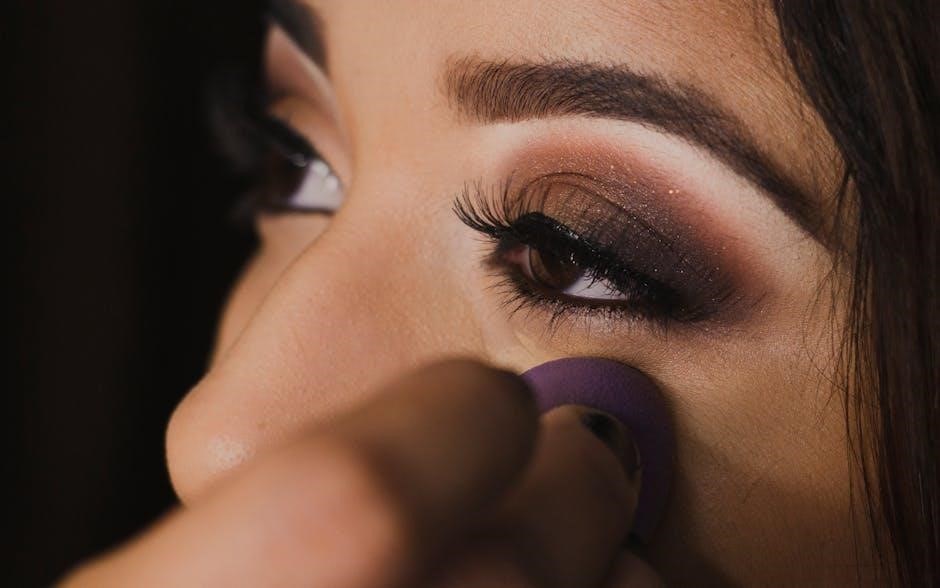
Eye Makeup: Making Your Eyes Pop

Eyes are the focal point, so enhance them! Camera-friendly eyeshadows, defined eyeliner, and volumizing mascara are essential. These techniques will create captivating, noticeable eyes in every photograph.

Eyeshadow: Selecting Camera-Friendly Shades

Choosing the right eyeshadow shades is crucial for a successful photoshoot look. What appears subtle in person can often get lost on camera, so it’s best to amplify your choices. Opt for shades that are a few tones deeper than your everyday makeup to ensure they translate well in photos;

Avoid overly shimmery or glittery eyeshadows, as they can create unwanted glare and flashback under studio lights. Instead, focus on matte or satin finishes that provide depth and dimension without being distracting. Warm-toned shades like browns, bronzes, and golds generally photograph beautifully, adding warmth and enhancing your eye color.

Don’t be afraid to experiment with slightly bolder colors, especially if you have lighter eyes. A touch of plum or emerald can make your eyes pop! Remember to blend your eyeshadow thoroughly to avoid harsh lines and create a seamless, professional finish. Proper blending is key to a polished, camera-ready eye look.

Eyeliner: Defining and Enhancing Eyes

Eyeliner is a powerful tool for defining and enhancing your eyes in photographs. However, a heavy-handed application can appear harsh under the bright lights of a photoshoot. The key is to build up the intensity gradually, starting with a thin line and adding more product as needed.

Black eyeliner is a classic choice, but consider using a dark brown or charcoal gray for a softer, more natural look. For a subtle lift, slightly wing out the eyeliner at the outer corners of your eyes. Smudging the eyeliner along the lash line can create a smoky effect that adds depth and dimension.

Waterproof eyeliner is essential to prevent smudging or running, especially if you’re prone to tearing up or if the photoshoot involves outdoor elements. Pay attention to your eye shape and adjust the eyeliner application accordingly to flatter your features. A well-defined eye will truly captivate the camera!

Mascara: Creating Volume and Length

Mascara is crucial for making your eyes appear larger and more defined in photos. Because cameras can sometimes wash out features, several coats are often necessary – more than you’d typically use for everyday wear. Don’t be afraid to layer the product, allowing each coat to dry slightly before applying the next to avoid clumping.

Opt for a waterproof or water-resistant formula to prevent smudging or flaking under studio lights or in outdoor conditions. Consider using an eyelash curler before applying mascara to lift and open up your eyes. Focus on coating the base of your lashes to create a fuller look.

For added drama, apply a second coat to the outer lashes. Remember, the goal is to create visible, impactful lashes that draw attention to your eyes and enhance your overall look in the photographs.

Lip Makeup: Bold Colors for the Win

Lips often appear less vibrant in photos, so embrace bold, bright colors! Natural and nude shades can get lost, while vivid hues translate beautifully on camera, adding a pop.

Lip Liner: Defining Lip Shape and Preventing Bleeding

Lip liner is a crucial step often overlooked, but it’s a game-changer for camera-ready lips. It serves a dual purpose: defining your lip shape and preventing color bleeding, especially when using bolder shades.

For photos, choose a lip liner that closely matches your lipstick color, or opt for a neutral shade that complements your skin tone. Carefully outline your lips, slightly overdrawing if you desire a fuller appearance – but keep it subtle for a natural look.

Filling in your entire lip with liner before applying lipstick creates a base, enhancing color payoff and longevity. This technique ensures even coverage and prevents the lipstick from feathering or migrating, which can be particularly noticeable in high-resolution photos.

Blending the liner inwards with a lip brush softens the lines and creates a seamless transition to the lipstick. A well-defined lip shape will photograph beautifully, adding definition and polish to your overall makeup look. Don’t skip this step – it makes a significant difference!

Lipstick: Choosing Bright, Camera-Ready Colors

When it comes to lipstick for photos, embrace boldness! Natural hues and nude tones often get lost on camera, appearing washed out or even disappearing entirely under studio lights. Bright, saturated colors are your best friend for creating a noticeable and impactful lip look.

Reds, berries, and vibrant pinks photograph exceptionally well, adding a pop of color and drawing attention to your smile. Consider your skin tone when selecting a shade – warmer tones suit coral and orange-based reds, while cooler tones look stunning in berry and blue-based reds.

Matte or satin finishes are generally preferred over glossy lipsticks, as gloss can create unwanted reflections and glare in photos. Ensure your lips are well-hydrated before application to prevent cracking and ensure a smooth finish.

Don’t be afraid to experiment and choose a color that makes you feel confident and radiant. A bold lip can instantly elevate your entire look and create a memorable photograph!

Final Touches & Avoiding Common Mistakes

Lock in your look with setting powder and bronzer for a flawless finish! Avoid white under-eye mishaps by using a light hand with concealer, ensuring a natural glow.

Setting Powder: Locking in Your Makeup

Setting powder is absolutely crucial for ensuring your makeup stays put throughout your photoshoot, especially under the bright lights of a studio. It effectively minimizes shine and prevents creasing, creating a smooth, even base for the camera to capture.

Choose a finely milled powder – translucent is a safe bet for all skin tones – and apply it strategically. Focus on areas prone to oiliness, such as the T-zone (forehead, nose, and chin), but don’t be afraid to lightly dust it over your entire face.

Application methods vary; a large fluffy brush provides a soft, diffused finish, while a sponge or brush pressed into the skin offers more coverage. Remember, less is often more! You can always build up the powder gradually to avoid a cakey appearance.

A key tip: lightly bake under your eyes with a brightening powder to further prevent concealer from shifting or appearing white in flash photography. This technique sets the concealer and creates a flawless, illuminated under-eye area.

Avoiding White Under-Eye Mishaps with Concealer

The dreaded white under-eye in photos is a common pitfall, but easily avoidable with the right techniques! Flash photography exaggerates brightness, making concealer appear much lighter than it is in natural light. To combat this, choose a concealer one to two shades lighter than your skin tone, but avoid anything too stark.

More importantly, layer your concealer strategically. Start with a color corrector – peach or orange tones neutralize blue or purple undertones – before applying your concealer. This creates a balanced base and prevents the concealer from having to work overtime.

Blend thoroughly, ensuring there are no harsh lines. Then, and this is vital, set the concealer with a generous amount of setting powder (as discussed previously!). This “baking” technique locks the concealer in place and prevents flashback.

Finally, remember that professional studio lights wash out makeup, so don’t be afraid to apply a bit more coverage than you normally would for everyday wear.

Bronzer: Framing the Face & Adding Warmth

Bronzer is your secret weapon for adding dimension and life back into your complexion, especially under the harsh glare of studio lights. Cameras tend to flatten features, and bronzer helps to sculpt and define;

Opt for a sheer, matte bronzer – avoid anything too glittery or shimmery, as this can appear unnatural in photos. Apply it strategically around the perimeter of your face: along your temples, under your cheekbones, and along your jawline.

Think of it as “painting” the edges of your face to create a subtle, sun-kissed glow. This technique not only adds warmth but also draws the eye inward, highlighting your features.

A light dusting on the bridge of your nose can also add subtle definition. Remember, the goal is to enhance your natural contours, not to create a dramatically different look. Blend, blend, blend – seamless application is key!

what i found meaningful about today’s tutorial session is

Today’s tutorial session was engaging and insightful, offering a blend of interactive activities, real-life examples, and multimedia elements that enhanced understanding. The structured presentation and group work fostered collaboration, while expert insights provided deeper knowledge and clarity.

Engagement in Today’s Tutorial Session

Interactive activities and multimedia captured my attention, making complex concepts clear. Real-life examples and group work made the session relatable and collaborative, enhancing my engagement and participation throughout the tutorial.

Interactive Activities That Captivated My Attention

Today’s tutorial session incorporated a variety of interactive activities that genuinely captivated my attention and enhanced my learning experience. Polls, quizzes, and hands-on exercises were seamlessly integrated, making complex concepts more accessible and engaging. The use of multimedia, such as videos and animations, added a dynamic layer to the session, keeping me focused and interested. Real-time feedback through interactive tools allowed me to gauge my understanding instantly, which was both motivating and helpful. Additionally, group discussions and role-playing scenarios encouraged active participation, fostering a collaborative environment. These activities not only broke the monotony of traditional lectures but also made the content more relatable and memorable. By incorporating real-life examples, the session bridged the gap between theory and practice, making the learning process more enjoyable and impactful. Overall, the interactive elements played a crucial role in maintaining my engagement and ensuring a deeper understanding of the material. This approach made the tutorial session both educational and enjoyable, leaving a lasting impression on me.

The Role of Multimedia in Enhancing Understanding

The strategic use of multimedia elements in today’s tutorial session played a pivotal role in enhancing my understanding of the subject matter. Videos, images, and interactive tools were effectively integrated to create a dynamic learning environment. These visual aids helped break down complex concepts into digestible parts, making abstract ideas more concrete and relatable. For instance, the inclusion of videos allowed me to see processes in action, which complemented the theoretical explanations and improved retention. Additionally, interactive graphs and charts enabled me to experiment with variables, fostering a deeper comprehension of cause-and-effect relationships. The use of high-quality images and diagrams provided clear visual representations, aiding in note-taking and review. Furthermore, audio clips featuring expert insights added depth and authenticity to the discussion, enriching the learning experience. Overall, the combination of multimedia elements not only enhanced engagement but also facilitated a more comprehensive grasp of the material, making the session both informative and memorable.

Real-Life Examples That Made Concepts Relatable

One of the most meaningful aspects of today’s tutorial session was the use of real-life examples to illustrate key concepts. These examples bridged the gap between theory and practice, making abstract ideas more tangible and accessible. For instance, the instructor shared a case study about a local business that successfully implemented the strategies we were learning. This not only clarified how the concepts worked in practice but also demonstrated their relevance to everyday situations. Another impactful example was a scenario involving a common challenge faced by professionals in the field, which helped us understand how to apply the solutions we were discussing. By grounding complex ideas in relatable contexts, the session made it easier to grasp and retain the information. These examples also sparked meaningful discussions, as they often mirrored real-world problems we might encounter. Overall, the use of real-life examples enhanced my understanding and made the session more engaging and memorable.

Group Work and Its Impact on Learning

Group work during today’s tutorial session was a highly meaningful aspect that significantly enhanced my learning experience. It provided an opportunity to collaborate with peers, share diverse perspectives, and engage in active discussions. By working together, we were able to pool our knowledge and ideas, leading to a deeper understanding of the material. The interactive nature of group work kept me focused and motivated, as it allowed me to contribute and learn from others simultaneously. Additionally, receiving feedback from peers and instructors during group activities helped me identify areas for improvement and refine my thinking. The camaraderie and teamwork fostered a supportive learning environment, making complex concepts feel more approachable. Overall, group work not only strengthened my problem-solving and communication skills but also made the session more dynamic and enjoyable. It demonstrated the value of collaboration in education and how shared efforts can lead to richer learning outcomes.

Content Quality and Relevance

The tutorial session’s content was exceptionally well-structured, ensuring clarity and effectiveness. Topics were highly relevant to my interests, making the material engaging and easy to connect with. Expert insights added depth, enhancing overall understanding and retention of key concepts.

Clarity of Presentation and Its Effectiveness

The clarity of presentation in today’s tutorial session was exceptional, making complex concepts easily understandable. The instructor used well-organized slides with bullet points and headings, ensuring a logical flow of information. Visual aids like diagrams and charts complemented the explanations, helping to break down difficult topics into digestible parts. The use of real-life examples further enhanced clarity, allowing me to relate abstract ideas to practical scenarios. The presenter’s ability to summarize key points at the end of each section was particularly effective, reinforcing retention and ensuring that no crucial details were overlooked. Additionally, the structured format of the session, with clear transitions between topics, kept the audience engaged and focused. Overall, the clarity of presentation not only improved my understanding but also made the session more enjoyable and impactful.

Relevance of Topics to My Interests and Needs

The topics covered in today’s tutorial session were highly relevant to my interests and needs, making the experience both meaningful and enriching. The content focused on areas I am passionate about, such as practical applications of knowledge and real-world problem-solving. The instructor’s ability to connect theoretical concepts to everyday scenarios resonated deeply with me, as it aligns with my goal of applying what I learn to real-life situations. Additionally, the session addressed specific challenges I have been facing, offering tailored insights and strategies to overcome them. The balance between theoretical and practical knowledge ensured that the material was not only informative but also actionable. This relevance kept me engaged and motivated, as I could see the direct impact of the topics on my personal and professional growth. Overall, the alignment of the content with my interests and needs made the session particularly valuable and memorable.

Structured Presentation for Better Retention

The tutorial session was structured in a way that significantly enhanced my ability to retain the information. The instructor organized the content into clear sections, each with specific objectives, making it easy to follow and digest. The logical progression of topics allowed me to build upon previously learned concepts, ensuring a smooth transition between ideas. Visual aids, such as slides and diagrams, complemented the verbal explanations, providing a dual-channel approach that reinforced understanding. Additionally, the session included regular summaries and key takeaways, which helped consolidate the material in my memory. The structured format also allowed for effective time management, ensuring that each topic received adequate attention without feeling rushed. Overall, the well-planned presentation made the session not only informative but also memorable, as the clear structure facilitated better retention and application of the concepts discussed.

Expert Insights That Deepened My Knowledge

One of the most meaningful aspects of today’s tutorial session was the incorporation of expert insights, which significantly enriched my understanding of the topics discussed. The instructor shared real-life examples and practical applications of the concepts, making them more relatable and easier to grasp. These insights were supported by evidence-based approaches, which added credibility and depth to the explanations. The expert also addressed common misconceptions, clarifying complex ideas and providing a clearer perspective on the subject matter. Additionally, the instructor’s ability to connect the content to broader contexts and current trends highlighted the relevance of what we were learning. The session also encouraged critical thinking, as the expert posed thought-provoking questions that challenged us to apply the concepts creatively. Overall, the expert insights not only deepened my knowledge but also inspired me to explore the topics further, making the session both educational and motivating.

Interaction and Collaboration

Today’s session emphasized meaningful interaction and collaboration, fostering a supportive learning environment. Peer discussions, group activities, and instructor feedback encouraged active participation, enhancing problem-solving skills and promoting a deeper understanding of the material through shared insights.

Peer Learning and Knowledge Sharing

Today’s tutorial session highlighted the significance of peer learning and knowledge sharing, creating a collaborative environment where ideas and insights were freely exchanged. Interactive activities, such as group discussions and problem-solving tasks, encouraged participants to engage with one another, fostering a sense of community and mutual understanding. The opportunity to share perspectives allowed for diverse viewpoints to emerge, enriching the learning experience. Real-life examples were particularly effective in making complex concepts relatable, enabling peers to connect theoretical knowledge with practical applications. Multimedia tools, such as videos and infographics, further enhanced comprehension by providing visual and auditory aids that catered to different learning styles. The session also emphasized the importance of asking questions and seeking clarification, promoting a culture of openness and support. Through these interactions, I gained valuable insights from my peers and felt encouraged to contribute my own understanding, creating a dynamic and inclusive learning atmosphere. This collaborative approach not only deepened my engagement but also reinforced the material, making the session both meaningful and memorable.

Constructive Feedback and Its Importance

Constructive feedback played a pivotal role in today’s tutorial session, serving as a cornerstone for growth and improvement. The instructor provided thoughtful insights that were both specific and actionable, allowing participants to identify areas of strength and opportunities for development. Peer feedback was equally valuable, fostering a supportive environment where ideas were shared openly. The emphasis on clarity and specificity in feedback ensured that it was meaningful and impactful, rather than vague or unhelpful. This approach not only enhanced understanding but also encouraged reflection and self-improvement. The session demonstrated how constructive feedback, when delivered with empathy and precision, can bridge gaps in knowledge and build confidence. By creating a safe space for feedback, the tutorial session promoted a culture of continuous learning and collaboration, making it a truly enriching experience. The ability to receive and act on feedback was a key takeaway, underscoring its importance in both academic and professional contexts. This focus on constructive criticism made the session not only educational but also personally transformative.

Instructor Support and Guidance

The instructor’s support and guidance were instrumental in making today’s tutorial session impactful and meaningful. Their availability to address questions and clarify doubts created a safe and supportive learning environment. The instructor’s approachability encouraged active participation, as they were always ready to provide personalized attention and insights. Their ability to break down complex concepts into understandable parts was exceptional, ensuring that everyone could follow along. The guidance offered during group activities and individual tasks helped maintain focus and direction, preventing confusion and fostering productivity. The instructor’s expertise and patience were evident in how they tailored explanations to meet diverse learning needs. Their proactive approach in anticipating questions and offering additional resources demonstrated a commitment to student success. The session highlighted the importance of instructor support in facilitating understanding and engagement, making the learning experience both effective and enjoyable. The instructor’s dedication and willingness to help were key factors in the session’s success and left a lasting positive impression.

Personal Growth and Development

Today’s session significantly contributed to my personal growth by enhancing my problem-solving skills and boosting my confidence through active participation. The interactive activities and real-life examples made learning engaging and meaningful, fostering overall development.

New Skills Acquired During the Session

Today’s tutorial session equipped me with several valuable skills that I found particularly meaningful. For instance, I learned how to structure my writing more effectively, using clear outlines and focusing on specific research questions. This improved my ability to organize ideas logically, ensuring that my content is both coherent and engaging. Additionally, I gained insights into how to use AI tools like ChatGPT for enhancing writing quality, such as generating ideas, summarizing content, and refining sentences. These skills will undoubtedly help me produce more polished and professional work in the future.

I also developed better critical thinking and problem-solving abilities through interactive activities and real-life examples presented during the session. Group work further enhanced my collaboration skills, teaching me how to contribute effectively to team projects. Overall, the session was a rich learning experience that equipped me with practical tools for personal and academic growth.

Building Confidence Through Participation

Participating actively in today’s tutorial session significantly boosted my confidence in expressing ideas and engaging with the material. The interactive environment encouraged me to voice my thoughts, ask questions, and clarify doubts, which helped me feel more comfortable contributing to discussions. By sharing my perspectives, I realized the value of my insights and gained confidence in communicating effectively.

The session also provided opportunities to present ideas and receive constructive feedback, further enhancing my self-assurance. Learning how to articulate my thoughts clearly and defend my opinions gave me a sense of accomplishment. Additionally, seeing my peers engage positively with my contributions reinforced my belief in my abilities. This experience has empowered me to participate more confidently in future sessions, knowing that my input is valued and meaningful.

Enhanced Problem-Solving Abilities

Today’s tutorial session significantly enhanced my problem-solving abilities by introducing practical strategies and real-world applications. The structured exercises and interactive activities encouraged me to think critically and approach challenges from multiple perspectives. For instance, the session included case studies that required analyzing complex scenarios, identifying key issues, and proposing effective solutions. This hands-on approach helped me develop a systematic way of tackling problems, improving both my analytical and creative thinking skills.

The opportunity to collaborate with peers further enriched my problem-solving experience. Sharing diverse ideas and receiving feedback allowed me to refine my approaches and consider viewpoints I hadn’t initially thought of. The session also emphasized the importance of breaking down problems into manageable parts, a technique that boosted my efficiency in addressing challenges. Overall, the tutorial has equipped me with improved problem-solving tools, enabling me to handle future tasks with greater confidence and precision.

Future Applications of What I Learned

Today’s tutorial session provided practical skills and insights that I can apply to real-world challenges. The concepts learned will enhance my professional growth and personal projects, enabling me to approach tasks with improved efficiency and innovation.

Applying Knowledge in Real-World Scenarios

One of the most meaningful takeaways from today’s tutorial session was the ability to connect the concepts learned to real-world applications. The interactive activities and real-life examples provided a clear understanding of how these skills can be implemented in professional and personal contexts. For instance, the problem-solving techniques demonstrated during group work can be directly applied to workplace challenges, while the multimedia elements presented offered practical strategies for enhancing communication and collaboration. The structured presentation also highlighted how to approach complex tasks systematically, ensuring efficiency and effectiveness. Additionally, the expert insights shared during the session provided valuable perspectives on how to adapt these skills to diverse scenarios, making the learning experience even more relevant and actionable. Overall, the session equipped me with tools and knowledge that I am confident will benefit me in various real-world situations, from academic projects to professional endeavors.

Connections to Broader Contexts and Interests

Today’s tutorial session resonated deeply with my broader academic and personal interests, offering insights that extend beyond the classroom. The concepts explored, such as interactive learning strategies and real-world applications, aligned with my passion for understanding how education can be tailored to individual needs. The session’s focus on multimedia and group work highlighted the importance of collaboration and adaptability in today’s interconnected world. Additionally, the expert insights shared during the session connected to my interest in career development, as they emphasized the value of clear communication and problem-solving skills in professional settings. The ability to apply these skills to real-world scenarios, such as freelance writing or research projects, further underscored their relevance. Overall, the session reinforced my belief in the power of education to shape not only academic success but also personal and professional growth, making it a truly meaningful experience.

Today’s tutorial session was enlightening, offering valuable insights through interactive elements and real-life examples. It fostered a collaborative environment, enhancing my understanding and skills. The session effectively bridged academic concepts with practical applications, promoting intellectual growth and preparing me for future challenges.

Overall Satisfaction and Positive Impact

Reflecting on today’s tutorial session, I feel highly satisfied with the overall experience. The session was thoughtfully structured, balancing interactive activities, multimedia presentations, and real-life examples that made complex concepts accessible. The use of group work and peer learning created a collaborative environment, fostering mutual understanding and engagement. I particularly appreciated the clarity of the presentation, which ensured that key points were effectively communicated and retained. The relevance of the topics to my interests and needs made the session feel personalized and meaningful. The instructor’s support and guidance further enhanced the learning experience, providing valuable insights and addressing queries promptly. Overall, the session not only deepened my knowledge but also inspired confidence and a renewed enthusiasm for applying the concepts in real-world scenarios. The positive impact of this session is evident in my improved understanding and the skills I acquired, which I am eager to utilize in future challenges.

Final Thoughts on the Tutorial Session